Aptean Mobile Warehouse Registration Activity
If you open the Receive activity from the Aptean Mobile Warehouse Registration home screen, you will see a list of released warehouse receipts assigned to your user ID and with a released status.
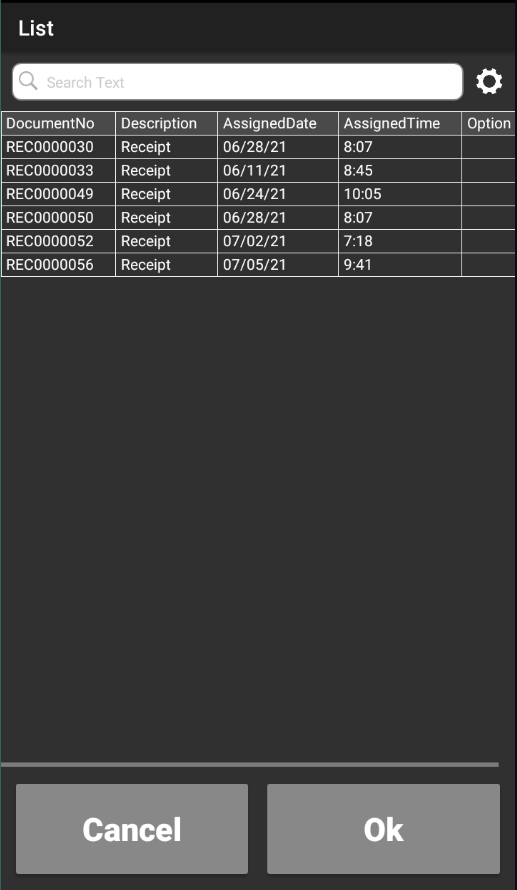
You can select the desired document and click the OK button. This will open the Receive page with the relevant document assigned.

Please note that the user-assigned receipts list is only displayed when launching the activity from the home screen icon. If you access the Receive activity through the Action menu or via a quick scan, it will directly take you to the Receive page. In such cases, if a warehouse receipt was not previously assigned to the user, the program will automatically update the assigned user ID.
You can also perform a quick scan for an open warehouse receipt. In this case, Aptean Mobile Warehouse Registration will prompt you to release the receipt before proceeding with further processing. You can change the receipt's status directly from the Receive page by selecting the Change Status option.
When launching the Receive activity through a quick scan on an inbound document that is already assigned to a warehouse receipt, the application will display that specific receipt. If no warehouse receipt is assigned to the inbound document, a new warehouse receipt will be automatically created for the transaction, and the mobile user will see this new record.
To change the currently-assigned warehouse receipt to a different one, you can manually enter or scan the receipt number in the PO/Trans/WMS No. field and press Enter or F5 on the handheld device.
To obtain additional information about the items assigned to the receipt, you can navigate to the Lines tab.
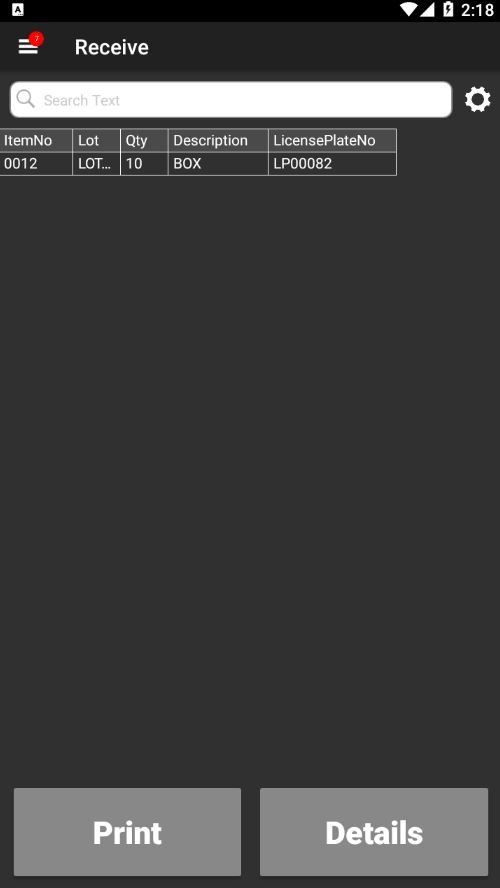
If the Aptean License Plating extension is also installed, you can see the Lot No. and License Plate No. on the Summary page of Receive activity. For handling license plate tracked items, see Processing Warehouse Receipt on License Plate.
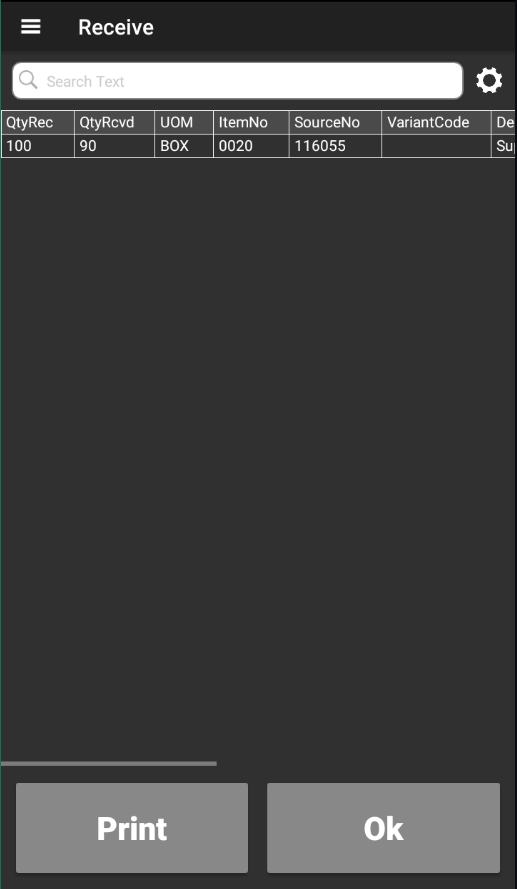
On the Summary tab, you can view the items listed on the warehouse receipt along with the quantity awaiting receipt and any received quantities. By selecting a line and clicking the OK button, you can automatically assign that line for receiving activity. If desired, you can also print a label for received items by selecting a line and clicking the Print button.
If the Label Printing Method field on the Mobile Setup page is set to Labeling, the Aptean Food & Beverage Labeling extension will handle printing labels. . In this case, a receipt label with the label subtype 7317 must exist in order to match the subtype sent from the API to the mobile device and enable printing of the receiving information.
Alternatively, if the Label Printing Method field is set to RDLC, the standard RDLC report will be used for printing the receiving label.
The Summary tab also provides a summary of the picking activities recorded for the receipt.
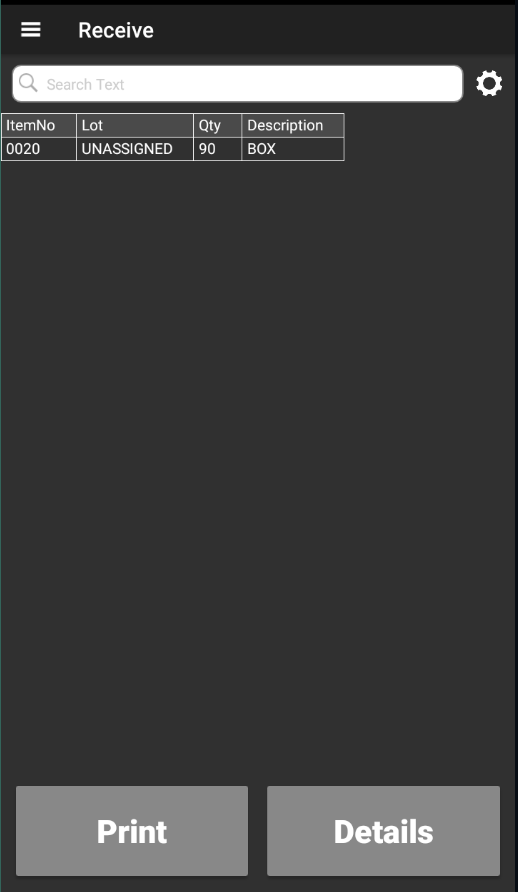
This screen presents a single line for each item (and lot, if applicable) that has been received. This view also includes the quantity of the item that has been received. It is possible to print a label for received items by selecting the desired line and clicking the Print button.
In case that the Labeling option has been selected in the Label Printing Method field, the printing of the lot label will be handled by the Aptean Food & Beverage Labeling extension. Before being able to print a label, a lot label has to exist which contains 6505 as label subtype. This will match the subtype sent from the API to the mobile device and the label can therefore be used for printing lot information.
In case that the RDLC option has been selected in the field Label Printing Method, the printing of the lot label will be handled with the RDLC report that is selected in the Lot Tag Report ID field on the Mobile Setup page.
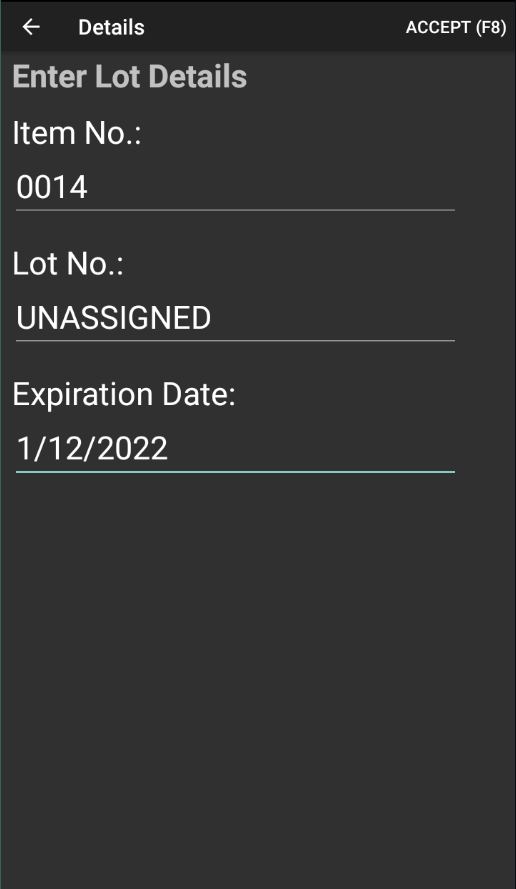
If the receive activity has been set up to assign lot numbers in batch, it is possible to enter lot-specific details about received items from the Summary screen by selecting the desired line and clicking the Details button. This opens a screen containing the fields from the Lot No. Information table that were specified for the Receive activity on the Profile Page Fields page in Business Central.
In case the Aptean Food and Beverage Lot Management extension has been installed and the item has a lot no. profile assigned, this profile will be used to generate a lot number.
Once any lot details have been recorded, the user can return to the Receive activity by clicking the Accept button at the top of the screen or physically pressing the F8 button on the handheld device. In case Auto Print Tag is enabled in the Mobile Profile Setup page, the lot label will be automatically printed. In case that the Labeling option has been selected in the Label Printing Method field, the printing of the lot label will be handled by the Aptean Food & Beverage Labeling extension. Before being able to print a label, a lot label has to exist which contains 6505 as label subtype. This will match the subtype sent from the API to the mobile device and the label can therefore be used for printing lot information.
In case that the RDLC option has been selected in the Label Printing Method field, the printing of the lot label will be handled with the RDLC report that is selected in the Lot Tag Report ID field on the Mobile Setup page.
Information about the individual activities that have been recorded for the receipt can be obtained on the Scanned tab.
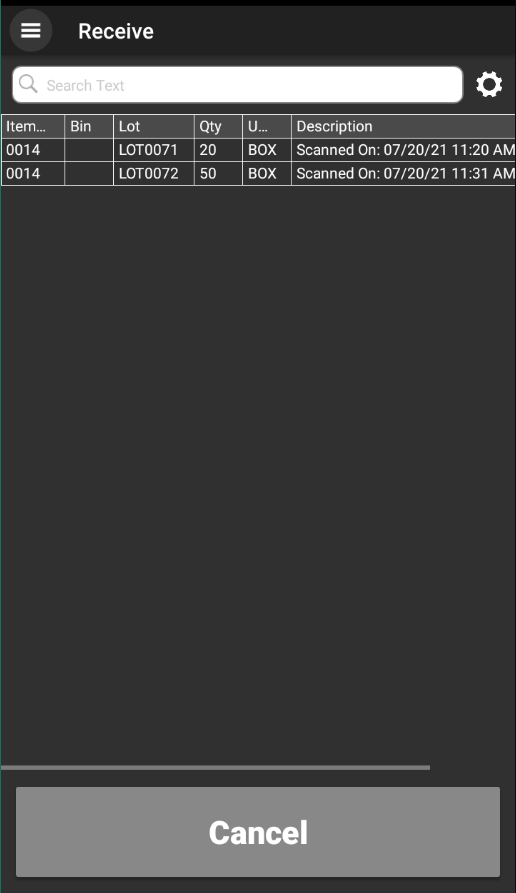
Unlike the Summary tab, this tab presents each receiving activity that was recorded. For example, two receiving activities for the same item and lot would be presented as one consolidated line on the Summary tab, but two separate lines on the Scanned tab.
To record receiving activity, complete the following steps:
- Enter or scan the item number in the Identifier field. The item must be listed on one of the warehouse receipt lines with a remaining quantity to receive.
If the item is lot tracked, you must specify the lot number in the Identifier field.
Alternatively, you can open the Lines tab, select a warehouse receipt line, and click the OK button to automatically assign the line's item and lot for receipt. -
Once the item number (and lot number, if applicable) is entered, information about the item will be displayed below the Identifier field.
Depending on the activity setup, you may see details such as the remaining quantity to receive and the quantity already received.
-
In the Qty. to Handle field, enter the quantity of the item to be received. Ensure that the entered quantity does not exceed the outstanding quantity to receive on the warehouse receipt. The quantity to receive will be updated accordingly.
-
The receiving activity can be entered multiple times for the same item. Depending on the setup, each additional quantity can be treated as absolute or cumulative. If quantities are treated as absolute, the latest quantity entered will replace the previous quantity. If quantities are cumulative, they will be added together.
For example, if we entered a quantity to handle of 2 units, the quantity to receive would be set to 2 units. If we then entered a quantity to handle of 3 units, the quantity to receive would also update to 3 units. If entered quantities are cumulative, each subsequent quantity to handle will be added to the total. Using our previous scenario, entering a quantity to handle of 2 units would result in a quantity to receive of 2 units, but entering a quantity to handle of 3 units would update the quantity to receive to 5 units. -
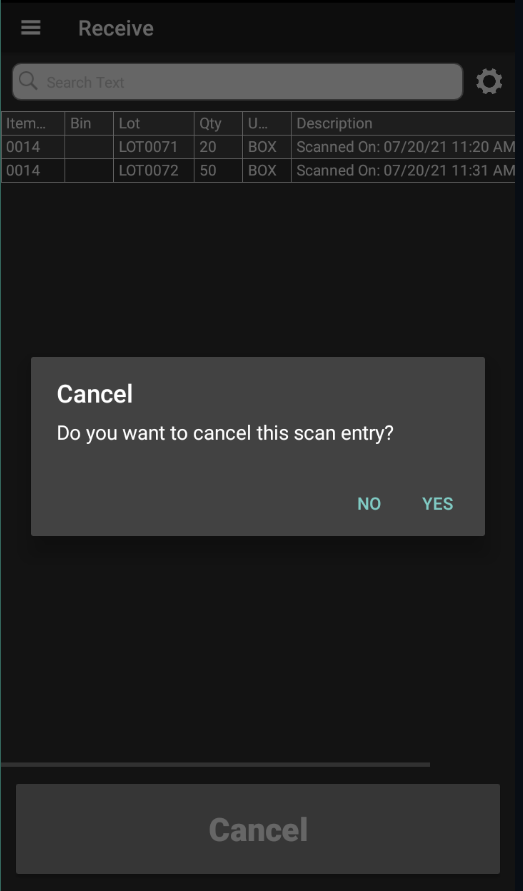
To cancel a received quantity, you can select a line on the Scanned tab and click the Cancel button. This will delete the line and undo the receiving activity. After canceling, you can record the receiving activity again.
-
Repeat the previous steps to receive additional items. The Aptean Mobile Warehouse Registration activity will maintain the currently-entered warehouse receipt, so that it is possible to specify additional items from the same document.
-
Once you have finished specifying the items for receipt, you can change the document's status to Pending. This can be done by clicking the Change Status
 button and selecting the Pending option or by pressing the F6 button on the handheld device. The warehouse receipt's status will be updated from Released to Pending Approval, making it inaccessible from Aptean Mobile Warehouse Registration. If you need to enter additional data on the handheld device, you must change the status back to Released within Business Central.
You can change the document status to released by executing the Released (F10) action or by pressing the F10 button on the handheld device. The warehouse receipt status is updated from Open to Released.
You can reopen a released document by executing the Open (F7) action or by pressing the F7 button on the handheld device.
Depending on the setup, you may have the option to post the warehouse receipt directly through Aptean Mobile Warehouse Registration. If enabled, you can click the option at the top of the screen and select the Post option or press the F9 button on the handheld device. This will transfer the recorded scan data to the Qty. to Receive field on the warehouse document in Business Central, which can then be posted.
After the warehouse receipt is posted on the mobile application, the system populates the associated entry on the Mobile Scan Entries list page in Business Central.
Receive items with auto-calculated expiration dates
To receive items with auto-calculated expiration dates, follow these steps:
- The Expiration Date Calc. field value must be set as Vendor Production Date on the Expiration Setup page associated with the item.
- The Use Expiration Dates toggle on the relevant Item Tracking Code Card page must be turned on.
- Open the Receive screen.
- Scan the barcodes for license plate, vendor lot number, production date, and quantity.
-
Scan the lot number (based on the Batch Assign Lot description on the Mobile Profile Setup page).
The system skips the expiration date entry.
The expiration date is automatically calculated by adding the production date and the expiration calculation (number of days) specified on the Item Card page.You can view the following field values (auto-filled) on the Details screen.
- Item No.
- License Plate No.
- Lot No.
- Vendor Lot No.
- Production Date
- Expiration Date
- Quantity
The system calculates and assigns the expiration date based on the vendor production date.
The warehouse receipt can be posted, and the lot information (including expiration and production dates) is updated accordingly.
This functionality works similarly when scanning the lot-tracked items for receipt activity.
You can add traceability source reference information directly on the Details screen during warehouse receiving operations.
When you post the warehouse receipt, the system automatically updates the traceability source reference in the lot details.When you select or enter a value in the Country of Origin field on the Details screen:
- The system updates the Mobile Scan Entries page with the selected Country Of Origin field value when you select the CLICK button.
- The system updates the lot origin details with the Country Of Origin field value when you post the warehouse receipt.
- When the Require Country of Origin toggle on the Item Card page is turned on and no value is selected in the Details screen, the system displays an error message when you select the CLICK button
- When the Require Country of Origin toggle on the Item Card page is turned on, but the country of origin is not defined, the system displays an error message when you post the receipt in the Aptean Mobile Warehouse app.
Update default country of
The system automatically populates the Country of Origin field value based on existing defaults or leaves it blank.
- If a default country of origin exists for the item and vendor combination, the Country Of Origin field value automatically updates with the default value on the Details screen.
- If no default country of origin exists, the field value is blank.
The Country Of Origin field displays the options based on the following priority:
- Values from the Allowed Countries of Origin page related to the purchase line when the warehouse receipt has a single source document.
- Values from the first document line when the warehouse receipt has multiple lines with the same item and different vendors.
- Values from the Countries/Regions page when the Require Country of Origin toggle on the Item Card page is turned on and no data exists on the Allowed Countries of Origin page for the purchase line.
- No values when the Require Country of Origin toggle on the Item Card page is turned off and no data exists on the Allowed Countries of Origin page for the purchase line.