Set up site configuration
The CONFIG & THEME tab of the e-commerce administration portal allows admin users to customize branding, contact information, announcements, and order guidelines for the e-commerce portal. This tab also includes visual settings, such as theme colors and logo, and functional configurations linked to Business Central companies.
You must be an admin user to access the SITE CONFIGURATION tab.
To update site configuration settings, follow these steps:
-
On the Ecom Administration page, select SITE CONFIGURATION.
The Site Configuration page opens.
-
In the General section, enter the required information in the following fields:
Field Description Upload new logo Upload an image file to display the company logo across the e-commerce portal. Select the appropriate image file from your system. Upload new logo (PWA) Upload the image to be used as the mobile app icon for the Progressive Web App (PWA). This icon appears on the device home screen after the e-commerce portal is installed as a PWA. Primary Theme Color Specify the main color theme of the portal. You can manually enter a HEX code or use the color picker to select a color that reflects your brand. Secondary Theme Color Specify the secondary accent color used on the portal. You can manually enter a HEX code or use the color picker to select a color. Site Name Enter the name of the e-commerce site. This identifies the business or instance being configured. Site Name in URL Enter a name to create a company-specific URL. You can use letters (A–Z, a–z), numbers (0–9), and hyphens (-). Share the generated link with your customers. When customers open the link, the login page displays your company logo (if uploaded) along with the login fields. Description Enter a short description of the site to help distinguish it from other site configurations. Customer Service Email Address Enter the customer service or support team email address that users can contact for help. Customer Service Phone No. Enter the customer support phone number, including the country code. Announcements Enter a message or alert that should appear on the Home page. For example, We will not be taking orders on February 17th, 2025. Privacy policy URL Enter the URL of your company privacy policy for display on the e-commerce portal. Company Select the Business Central company that this site is associated with. This links the portal configuration to the backend data of Business Central. -
On the Order Settings section, select the Allow Cancelling Orders? checkbox to allow customers to cancel their orders using the Cancel button associated with each order on the Home page. This checkbox is selected by default.
When the checkbox is cleared, the system hides the Cancel button for orders on the Home page. -
In the Abandoned Cart Settings section, enter the required information in the following fields:
Field Description Send users emails about abandoned carts? Turn on this toggle to automatically send reminder emails to users who have left items in their cart without checking out. Hours abandoned before sending email Enter the number of hours after which a cart is considered abandoned. The system begins monitoring carts and automatically sends reminder emails to users after their carts remain inactive for the specified duration. 
You can also customize the subject and message of the reminder email through the App Strings page via the IN-APP TEXT AND TRANSLATIONS tab. If no custom values are defined, the default subject and message are used.
The following option IDs can be used to personalize email.
- Text_Abandoned_Email_Subject
- Text_Abandoned_Email_Body
For more information, see In-app text and translations.
-
In the Automatic User Inactivation section, in the Automatically mark users inactive? field, enter the number of days of inactivity. Regular users who have not logged in within this period are automatically blocked. This ensures that accounts with no recent activity are restricted from logging in.
Admin users can manually unblock any user at any time by selecting the Inactive checkbox on the Edit user window associated with the User management page.
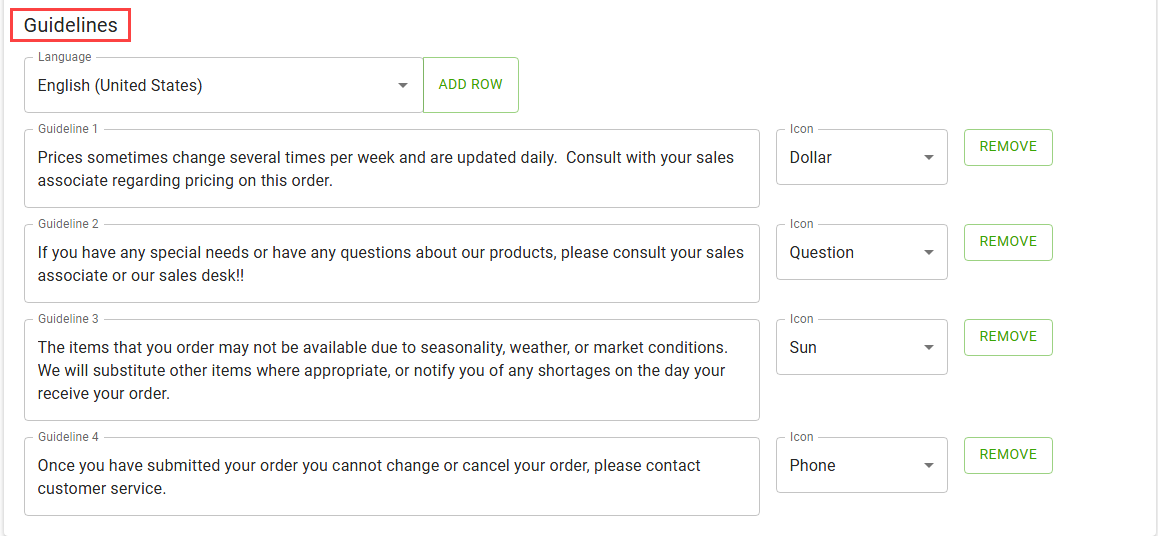
Configure site guidelines
You can display important messages, such as order deadlines or service hours, on the portal Home page using the Guidelines section.
To add, edit, or remove guidelines in your preferred language, follow these steps:
- In the Guidelines section, in the Language field, select the required language in which the guidelines should be displayed.
The available options are: English (United States), Spanish (Spain), Danish (Denmark), German (Germany), French (France), Dutch (Netherlands), and Swedish (Sweden). -
Select the ADD ROW button to create a new guideline.
In the new row:
- In the Guideline field, enter the guideline text that appears on the portal Home page, such as order deadlines or service hours (for example, All support requests will be addressed within 24 hours). As you add rows, the system displays the field name as Guideline 1, Guideline 2, and so on.
- In the Icon field, select a symbol that visually represents the guideline, such as Clock, Dollar, Question, Sun, or Phone, to represent the guideline.
- Select the REMOVE button to delete the respective guideline row from the configuration.
-
Select SAVE CONFIGURATION.
A notification appears to confirm that your settings have been saved.
You can select the RETURN TO SITE CONFIG button to open the Site Configuration page.