Reclass and put-away
Reclass
Reclass is the movement of inventory from one location to another location and from one bin to another bin.
Item reclassification journal
-
Select the Search icon
 , enter Item Reclassification Journals, and then choose the related link.
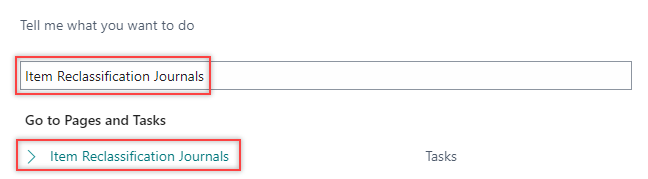
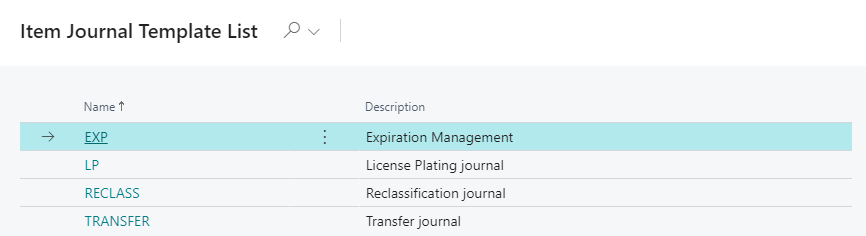
The Item Journal Template List page opens.
-
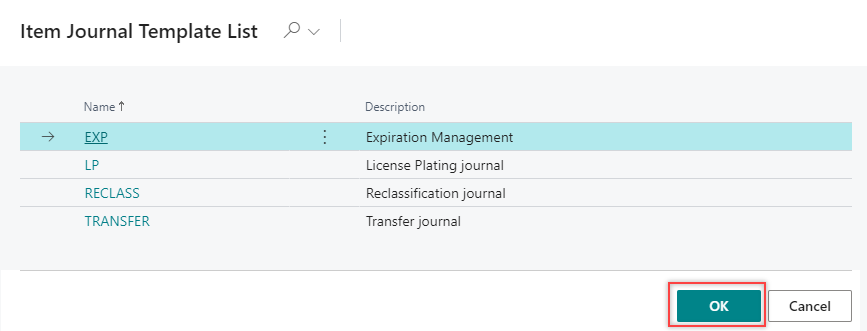
select the required template Name and select OK.
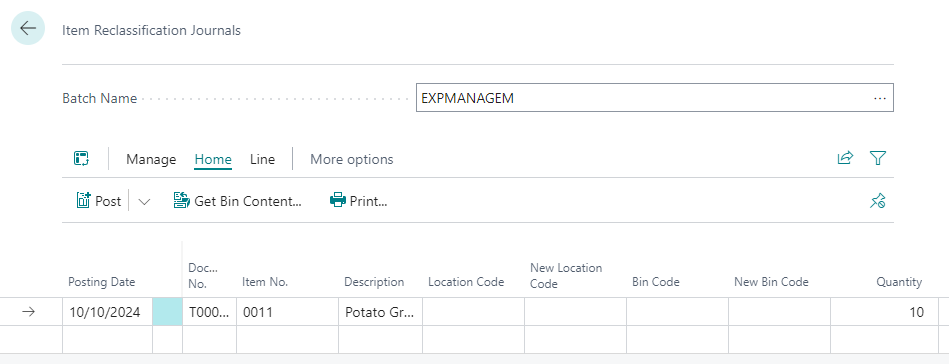
The Item Reclassification Journals page opens.
-
On the Item Reclassification Journals page, fill in the following fields:
- Item No.
- Location Code
- New Location Code
- Bin Code (optional)
- New Bin Code (optional)
- Quantity
The values in the Posting Date and Document No. field values are automatically populated. The Unit of Measure code is also filled in by default but can be modified as needed.
You can complete the reclassification in two ways, depending on bin requirements: with bins or without bins.
With bins
- The Bin Code and New Bin Code fields can be added to the lines via personalization.
- This type of inventory movement typically occurs within the same location, but with different bins. There is the possibility of moving bins & locations simultaneously as desired as well, however, we prefer the use of transfer orders for inventory movements between locations.

Put-away
Once inventory is received, inventory needs to be put-away into storage locations within the client facility.
Prerequisites
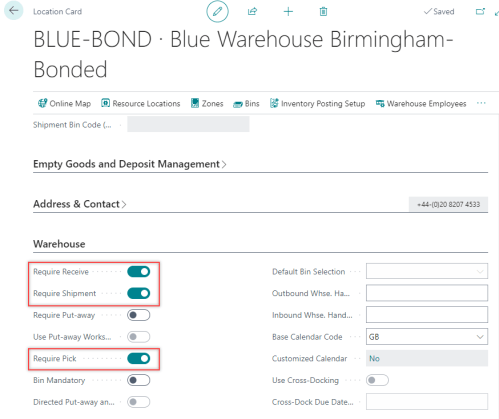
On the Location Card page, you must turn on the Require Receive, Require Put-away, and Bin Mandatory toggles on the Warehouse FastTab to create a put-away.
-
Create a new purchase order or use an existing purchase order you want to work with, and then release the purchase order.
-
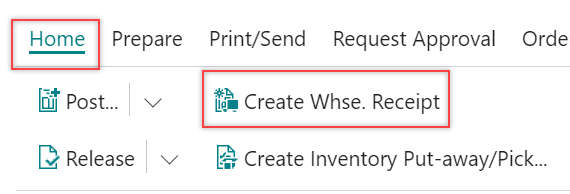
On the action bar, select Home > Create Whse. Receipt.
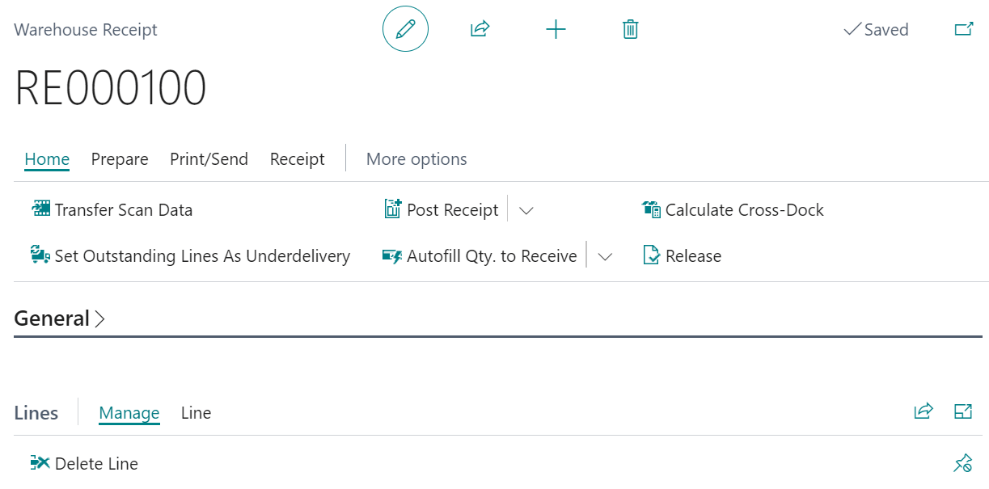
The Warehouse Receipt page opens.
-
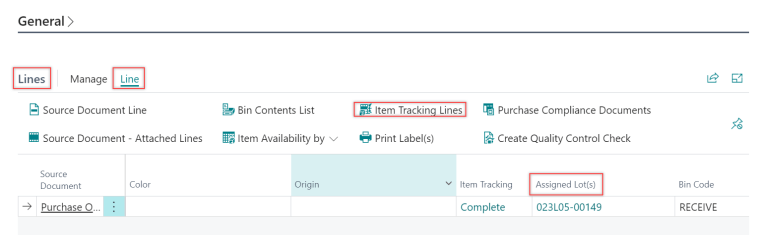
On the Lines FastTab, select Line > Item Tracking Lines. The system will automatically populate the value in the Assigned Lot(s) field.
-
On the action bar, select Home > Post Receipt, and then select Post and Print Put-away.
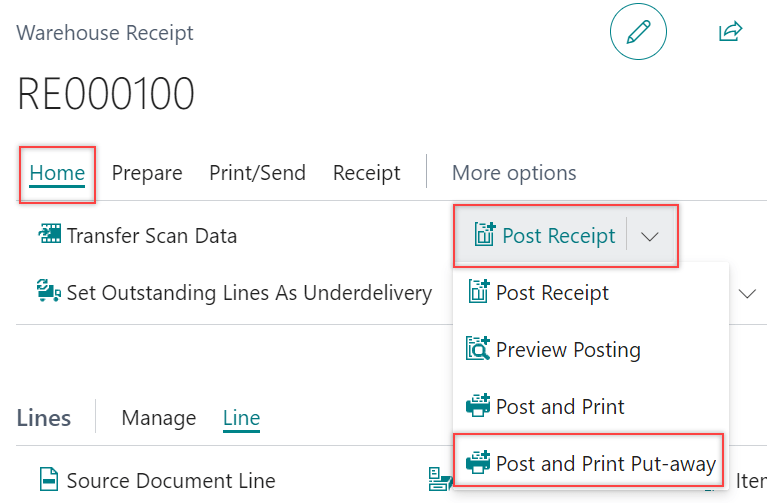
The Put-away is created.
Inventory put-away
-
Create a new purchase order or use an existing purchase order you want to work with, and then release the purchase order.
-
On the action bar, select Home > Create Inventory Put-away/Pick.
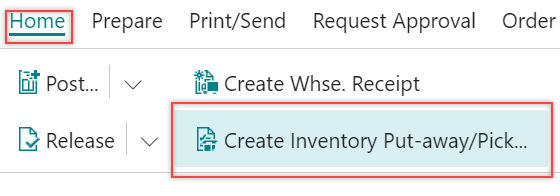
The Create Inventory Put-away/Pick/Movement card opens.
-
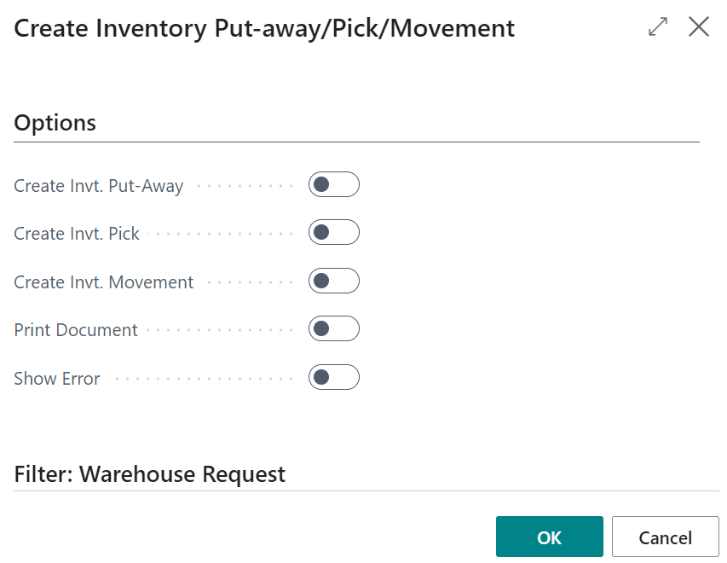
On the Options FastTab, turn on the toggles from the following list:
- Create Invt. Put-Away - Specifies if you want to create inventory put-away documents for all source documents that are included in the filter and for which a put-away document is appropriate.
- Create Invt. Pick - Specifies if you want to create inventory pick documents for all source documents that are included in the filter and for which a pick document is appropriate.
- Create Invt. Movement - Specifies if you want to create inventory movement documents for all source documents that are included in the filter and for which a movement document is appropriate.
- Print Document - Specifies if you want the document to be printed.
- Show Error - Specifies if the report shows error information.
The inventory put-away is created.