Set up production scheduling
Setup to show Work Center and/or Machine Center in Workload
The Workload page gives you insight into the assigned workload to multiple Work Centers/Machine Centers for the near future. The page signals if a Work Center or Machine Center is overloaded or underloaded.
Only Work Centers and Machine Centers with the setting 'Show in Scheduling Pages = Yes' are shown on the Workload and Production Order Scheduling page.
- Select the Search icon
 , enter Work Centers and then choose the related link.
The Work Centers list page opens. - Select the desired No. from the list.
- On the Scheduling FastTab, turn on the Show in Scheduling Pages toggle.
The Work Center is displayed on the scheduling pages. The setup is the same for a Machine Center.
The Work Center or Machine Center can be set up to sort the production orders per day or week based on the linked Production Scheduling Attributes. - In the Schedule Per field, select one of the following options:
- Day: Orders are sorted per day using the automated scheduling and manual scheduling functions.
Use this option only when scheduling orders for a single day, not multiple days.
- Week: Orders are sorted per week when using the automated scheduling and manual scheduling functions.
- Day: Orders are sorted per day using the automated scheduling and manual scheduling functions.
Setup Production Scheduling Attributes
The Production Scheduling Attributes are several dedicated item attributes that can be used when scheduling production orders. For example, when chocolate is produced, it is efficient to produce white chocolate first, then milk and then dark chocolate. In this way, the production line does not have to be cleaned when switching between batches because black chocolate would contaminate the white chocolate batch. As a result, production orders must be planned in the order of white, milk, and dark chocolate. The Production Scheduling Attributes can be set up to achieve this sequence of production routing lines via the function Automated Scheduling on the Production Order Scheduling page.
You can assign a maximum of five item attributes as production scheduling attributes. Each production scheduling attribute (e.g., ‘Color’) must be assigned to a hierarchical level. The same applies to the attribute values of those production scheduling attributes, every value (e.g., ‘White’) must be assigned to a hierarchical level.
- Select the Search icon , enter Production Scheduling Attributes, and then choose the related link.
The Production Scheduling Attributes page opens. - On the action bar, select New.
A new line is inserted. - In the Item Attribute field, select the desired option from the list.
- With the attribute line selected, on the action bar, select Attribute Values.
The Production Scheduling Attribute Values page opens. - On the action bar, select New.
- In the Item Attribute Value field, select the desired value from the list.
- In the Hierarchy field, enter the desired value.
The Item Attribute Value with the lowest hierarchy, will be planned first. A hierarchy with the number 0 is also included in the scheduling. If the same hierarchy is assigned several times to different values, the production orders with the earliest creation date will be planned first.
The Production Scheduling Attribute Values and Hierarchy are now set up for the Item Attribute Color.
A maximum of five Item Attributes can be assigned as Production Scheduling Item Attributes. - On the Production Scheduling Attributes page, on the action bar, select New.
- In the Hierarchy field, enter the value.
- In the Item Attribute field, select an option from the list.
The Item Attributes and Values are later used as the sequence in which the production orders must be planned. The lowest number in the hierarchy will be planned first.
Icon Setup
The Production Order Scheduling page supports production planners in their work, showing an overview of all Production Order Routing lines. The Scheduling Flexibility of each Routing line is visualized through an image on the page Production Order Scheduling. When installing the module, a set of default images will be set up for this functionality. When desired, it is possible to change these default pictures to your own set of pictures.
-
Select the Search icon
, enter Production Scheduling Setup, and then choose the related link.
The Production Scheduling Setup page opens.There are four Scheduling Flexibility-icons that must be set up: Free, Restricted, Locked, and Fixed.
The Free Flexibility status indicates that a Production Order Routing line in the page Production Scheduling can be moved with the functions Automated Scheduling, Manual Scheduling, and Manual Move. The Planning Flexibility of the line is Unlimited, and no entries (Consumption, Output, and Capacity) exist.
The Restricted Flexibility status indicates that a Production Order Routing line in the page Production Order Scheduling can be moved with the functions Automated Scheduling, Manual Scheduling and Manual Move. The Planning Flexibility of the line is Unlimited and no entries (Consumption, Output, and Capacity) exist. Production Order Routing lines with a Scheduling Flexibility= Restricted Flexibility deviate from lines with ‘Free Flexibility’ because Reservation entries exist for the specific Production Order line. When Reservation entries exist, the restriction is that the due date of the Production line can’t be moved after the shipment date of the linked sales line.
The Locked Flexibility status indicates that a Production Order Routing line in the page Production Order Scheduling can’t be moved with the functions Automated Scheduling, Manual Scheduling and Manual Move. No entries (Consumption, Output, and Capacity) exist and the Planning Flexibility of the Production Order line is None.
The Fixed Flexibility icon indicates that a Production Order Routing line in the page Production Order Scheduling can’t be moved anymore because entries (Consumption, Output, and/or Capacity) exist for the Production line.
- On the Icons FastTab, select Fixed Flexibility.
- Select Choose...
- Select an image.
The steps above are the same for the other icons. It is possible to reset all icons to their standard image. - On the action bar, select Actions > Set Icons to Default.
-
A dialog box opens with the following message:
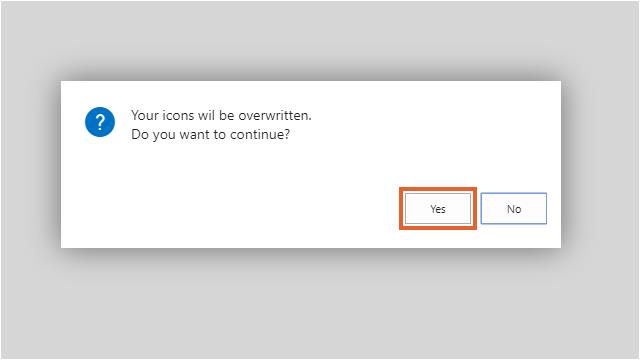
- Select Yes.
All icons are now reset to their default image.
The Production Preparation and Scheduling Setup is now completed.
Scheduling Setup
With this feature, you can allocate the required time to assist in scheduling and planning production orders with flexibility.
1. On the Production Scheduling Setup page, on the Scheduling FastTab, in the Downtime Orders Deletion Date field, enter the date formula determining when downtime production orders will be deleted. The calculated date is derived from the system date minus the specified date formula.
Any downtime production orders with a due date equal to or earlier than this calculated date can be removed via the Delete Downtime Production Orders report.
You can also use the Set up Production Scheduling wizard to create a job queue entry and manage the periodic deletion of downtime production orders.
2. In the Order type for Downtime Prod. Order field, select the production order type to be utilized when creating downtime orders through downtime scheduling.