Create lot numbers
After setting a lot no. profile for an item, when assigning a lot number, the lot number is generated based on the elements from this lot no. profile.
- Select the Search icon
 , enter Purchase Orders and then choose the related link.
 - On the Purchase Orders list page, on the action bar, click New to create a new entry on the Purchase Order card page.
- Click the lookup button in the Vendor Name field.
- Select and click the requiredvendor name and click OK.
- On the Lines FastTab, click the Type field and select the option Item.
- Click the No. field and select an item number, e.g., "0037", for which you have previously specified a lot no profile.
-
Enter Quantity.
For production orders, you can suggest a variable in the Lot No. to Use field on the production order line. It helps you to name the lot that will be assigned. The lot is named based on the combination of the value you provide in the Lot No. to Use field and the relevant item number.
This suggestion is considered only when you choose the Prod. Order Line Lot. No. option in the Element field on the relevant Lot No. Profile card page.
- On the action bar, click Line > Item Tracking Lines.
The Item Tracking Lines page opens. -
On the action bar, click Process > Assign Lot No.
The lot number based on the lot no. profile is now assigned. In this example the lot number is structured as follows:
- Year Number Short = 20
- Month Number = 05
- Day Number = 008
- Fixed Value = -
- Item No. = 0037
If the item is derived from a vendor,
- On the Vendor Production Date field, manually enter the date when the vendor produced the item.
-
On the Vendor Lot No. field, enter the lot number assigned by the vendor for the item.
When creating an inventory put-away or a warehouse receipt from a purchase order, the Vendor Production Date and Vendor Lot No. field values on the document lines are automatically filled in from the item tracking lines of the associated purchase order.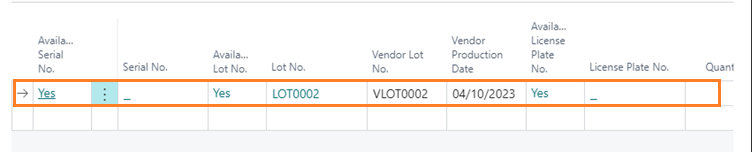
When you post a Purchase Order or an Inventory Put-away document, the values on the Vendor Production Date and Vendor Lot No. fields will be saved in the Lot Origin Details of its associated item.