Set up labels
You must integrate the Aptean Labeling extension with a label printing software (BarTender, BarTender Cloud, Loftware Cloud Trigger, or Loftware Cloud Print ). Additionally, you can set up label groups, label categories, and label output field mapping to use labels efficiently.
Prerequisite
The following procedure outlines the prerequisite required to use labels.
- Select the Search icon
 , enter Extension Management, and then choose the related link.
The Extension Management page opens. - In the Search field, enter Aptean Labeling for Food and Beverage, and then select the Enter key.
- Locate and select the Aptean Labeling for Food and Beverage extension.
The Extension Settings page opens. - On the General FastTab, turn on the Allow HttpClient Requests toggle.
If this toggle is turned off, the system displays a notification on the Role Center indicating that it is turned off.
The prerequisite for using labels is complete.
For detailed setup instructions, see the following topics based on the labeling software you want to integrate with:
| To | See |
|---|---|
| Integrate with BarTender software | Set up integration with BarTender software |
| Integrate with BarTender Cloud | Set up integration with BarTender Cloud |
| Integrate with Loftware Cloud Trigger | Set up integration with Loftware Cloud Trigger |
| Integrate with Loftware Cloud Print | Set up integration with Loftware Cloud Print |
Label categories
Label categories make it possible to print more than one different label at once, for instance, one for the product and one for its packaging. When printing labels, one label code per set up combination of source table and label category can be printed.
- Select the Search icon , enter Label Categories and then choose the related link.
The Label Categories page opens. - Enter Code.
-
Enter Description.

-
Repeat the steps to create multiple label categories. See Labels to link the label category to a label.
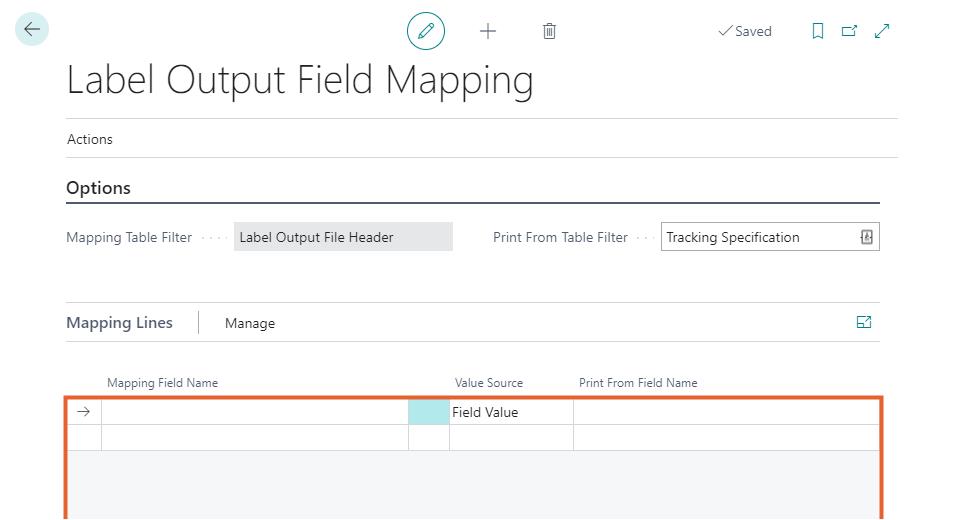
Label output field mapping
The data for the labels is stored in an output file. To give the user the freedom to decide for himself which data should be included in the output file, it is up to the user to map this data.
On the Label Output Field Mapping page, a link can be made between the "Print From Table" Fields and the "Label Output" Fields.
For the labels that are included in the Aptean Food & Beverage "APTFB 26 LBL Labels" package, the output field mapping has already been performed.
- Select the Search icon , enter Label Output Field Mapping and then choose the related link.
The Label Output Field Mapping page opens. - Click the lookup button in the Print From Table Filter field.
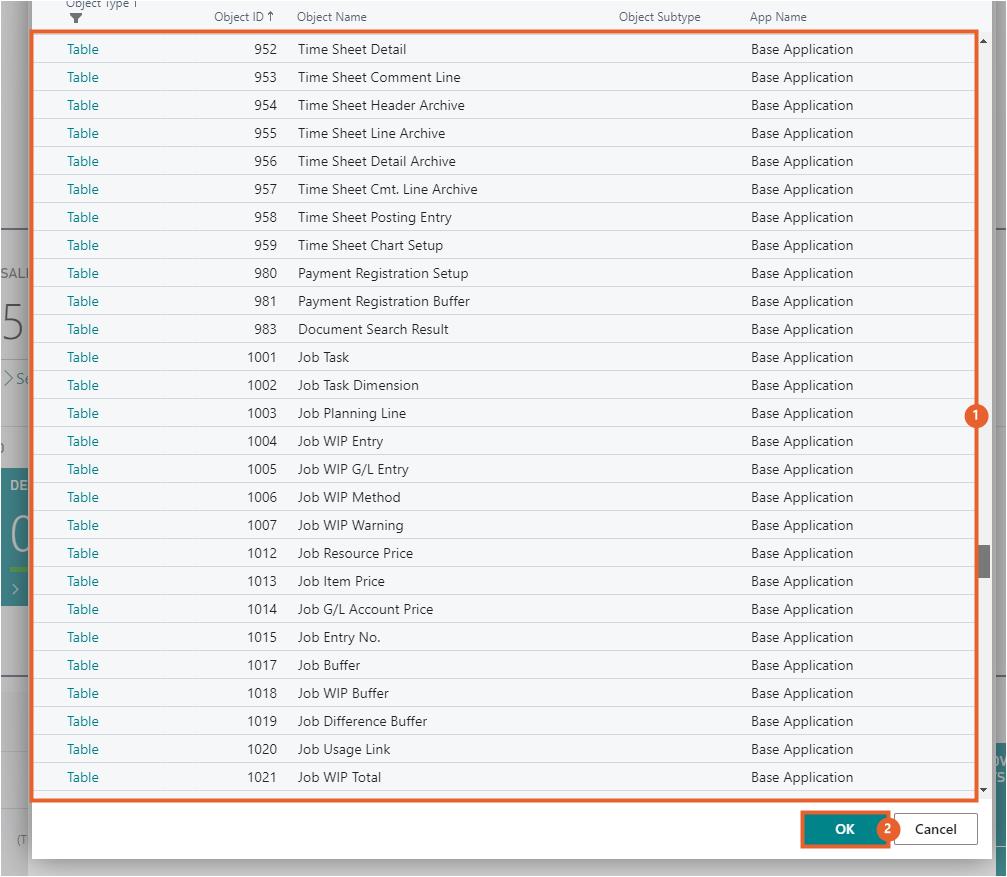
The All Objects with Caption page opens. -
Click the required Object Type to select the table. This is a table that corresponds with a table that is used as a "level 0 table" in the label setup. See Labels for more information.
-
Click OK.
Fixed value
-
Click the lookup button in the Mapping Field Name field on the Mapping Lines FastTab on the Label Output Field Mapping page.
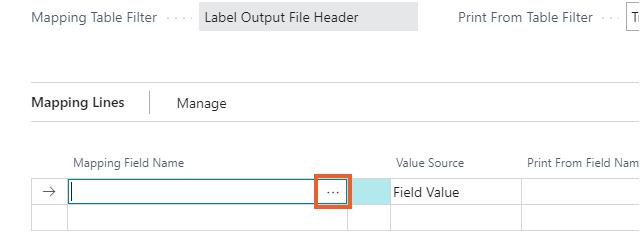
These are the fields from the label output header.
-
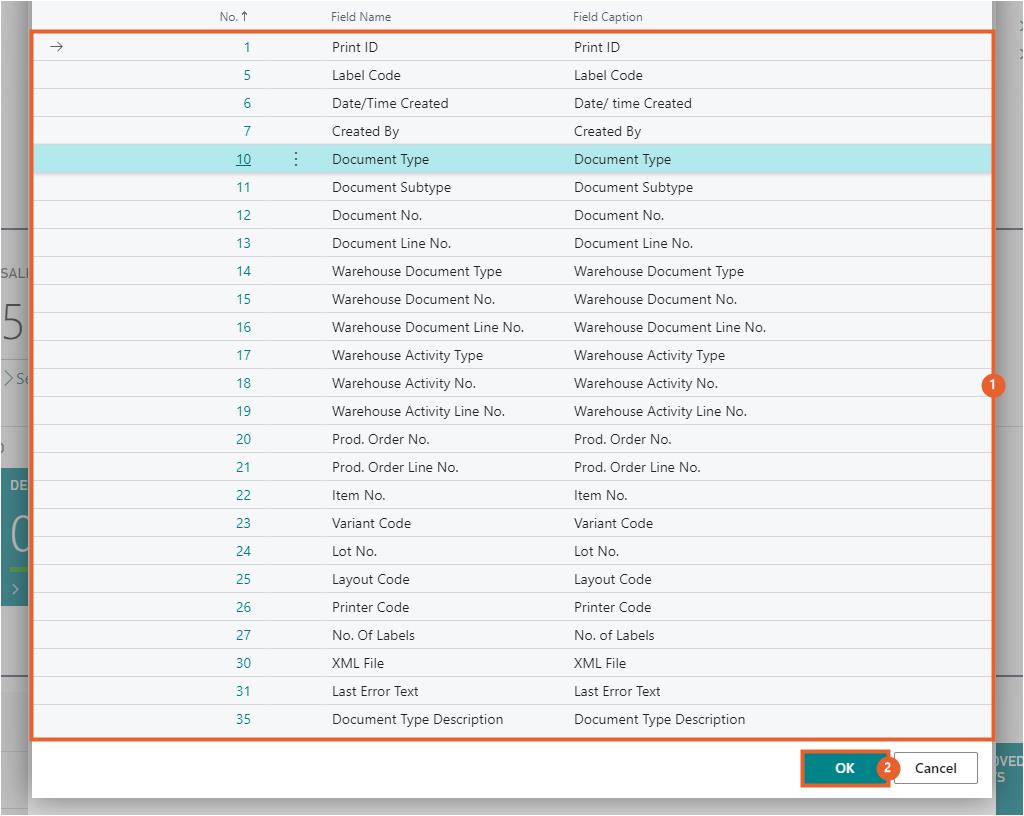
Click the required No. to select the mapping field name.
-
Click OK.
If the Value Source is Fixed Value then Print From Field Name can be entered manually.
-
Select the Fixed Value option in the Value Source field.

-
Enter Print From Field Name.
Field value
If the Value Source is Field Value that is set as default, the Print From Field Name is a value from the Print From Table.
- Click the lookup button in the Mapping Field Name field on the Mapping Lines FastTab on the Label Output Field Mapping page.
- Click the required row to select the mapping field name, e.g., "Document No.".
- Click OK.
-
Click the lookup button in the Print From Field Name field.
These are the fields from the selected Print From table.
A field is now mapped for the sales lines table.
Repeat these steps for as many tables and fields as needed.
-
Click the required No. to select a field name to link, e.g., "Source ID".

-
Click OK.
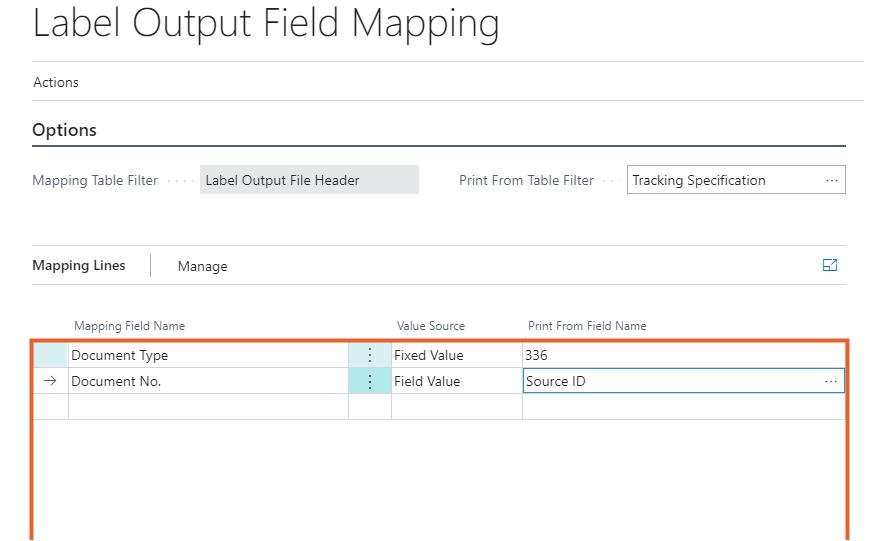
These fields are now mapped for the Tracking Specification table. Repeat these steps for as many tables and fields as needed.
Delete mapping
-
On the action bar, click Actions > Delete Mapping on the Label Output Field Mapping page.
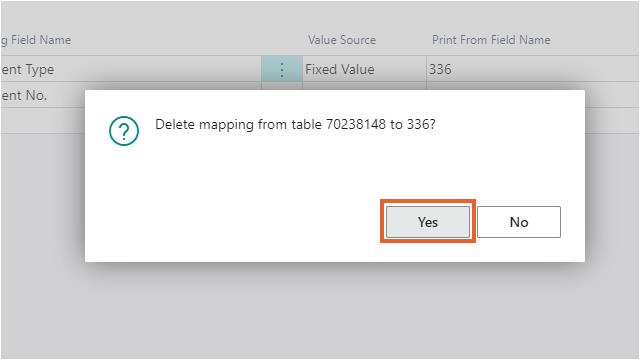
-
A confirmation dialog box appears, click Yes to confirm.
The mapping for the Print From Table Filter is now deleted.