Label selection
You can set up which label code must be printed for which customer, vendor or item, or a combination of them on the Label Selection page.
When printing, the system will check the label selection to determine which labels will be printed. It will first check which lines contain a source table that corresponds to the table from which the label is printed. Thereafter, for each label category is determined which label needs to be printed. This is determined on the basis of hierarchy. The order of the hierarchy is as follows:
- Customer/Vendor
- Customer/Vendor group
- Item
- Item group
- Item variant
If a combination of this data is used in the setup, the most specific is selected.
- Select the Search icon
 , enter Label Selections and then choose the related link.
The Label Selections list page opens. - On the action bar, click New.
The Label Selection card page opens. - The Source Table, Label Type and Label Category fields are automatically filled based on the selected label code.
- In the Label Qty. Type dropdown list, select the required option. The options are Fixed Quantity and Item Quantity.
This field specifies how the amount of labels is determined when printing. It is possible to set up a fixed quantity on this page or to base the number of copies on the amount of items in the source document. - Select the Item Quantity option.
- Click the lookup button in the Label Unit of Measure Code field and select the unit of measure for which the label is used, e.g., "Box".
This field specifies for which unit of measure the label is used. For example, per can or per box. When printing, the quantity to print is based on the unit of measure of the item in the source document. When the selected unit of measure is not set up for that item, 1 label is printed per default. -
Enter Label Qty. e.g., "1".
If the Label Qty. Type is Item Quantity, then the number of labels that will be printed is based on the amount of items in the source document times the entered Label quantity. When the Label Qty. Type is Fixed Quantity, the number of labels that will be printed is equal to the entered value.
> [!NOTE]
> When printing labels for warehouse receipt lines, ensure that the value specified in the Default Pallet UoM field on the Adv. Warehouse Setup page matches the corresponding field value on the Item Units of Measure page associated with the item. This enables the system to print the labels according to the specified label quantity on the Label Selection page. -
In the Item Type dropdown list, select the required options. The options in the list are: Item, Item Group, and All Item.
When using the option "Item Group" or "Item", the label will only be printed when that item or item group is linked to the source document. To be able to use these options, the item group or item must be set up. For more information, see Set up label group. - Click the lookup button in the No. field and select the Item number or the Item Group for which the label must be printed, e.g., select the item group "Allergen".
-
Click the Source Type field and select an option from the list, e.g., "Customer".

When using the option "Vendor", "Vendor Group", "Customer", or "Customer Group", the label will only be printed when that vendor/customer/vendor group/customer group is linked to the source document. To be able to use these options, they must be set up. For more information, see Set up label group.
-
Click the lookup button in the Source No. field and select the vendor or customer number (depending on the field Source Type) for which the label must be printed. E.g., Customer, "C0015 Bucofoods".
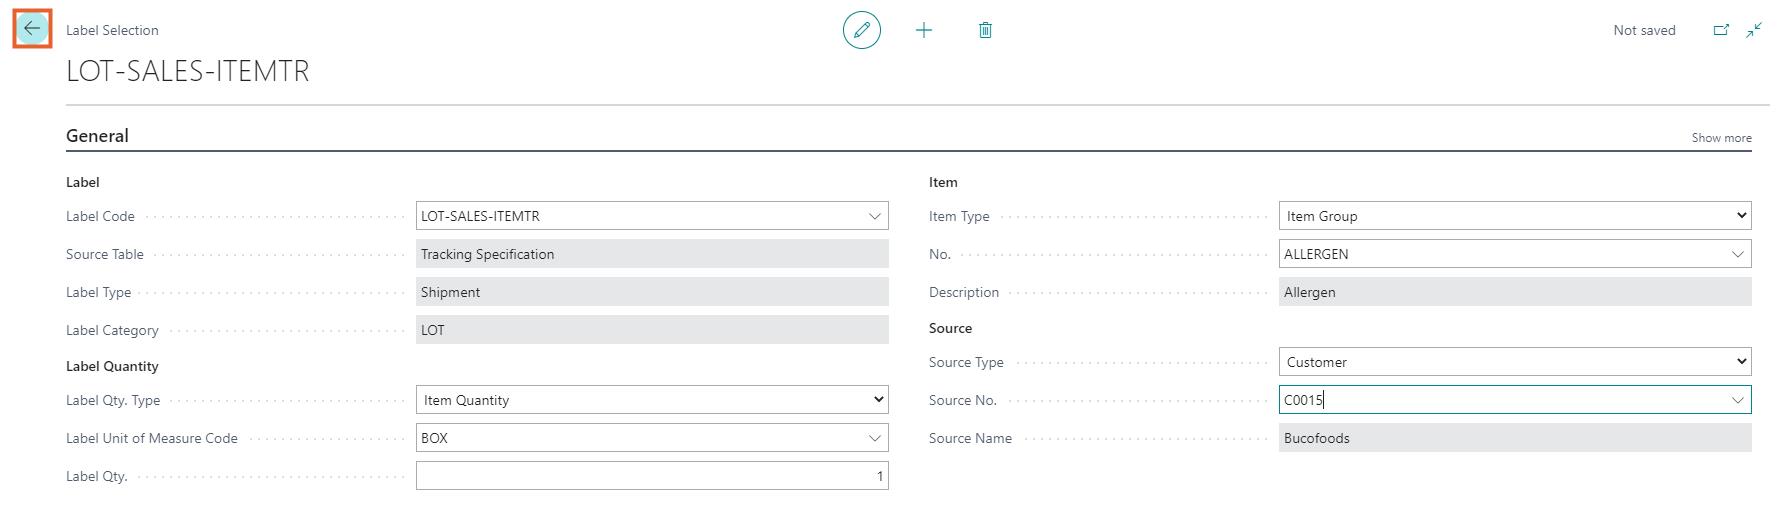
The Label selection for this label is now set up. In this example, this label will be printed when the source document (sales order or purchase return order) contains the item group "Allergen" and the customer "Bucofoods". The amount of labels that is printed is the amount of Boxes in the source document times is 1.