Change inspection status using a tablet in the warehouse
You can use the Change Inspection Status Worksheet screen on a tablet to quickly review and update inspection statuses while working on the warehouse floor. This worksheet is optimized for mobile use, allowing inventory managers or floor operators to change inspection statuses at the point of inspection. This feature helps you update multiple records at once without returning to a workstation.
To change the inspection status, follow the below steps:
-
Tap the Search icon
 , enter Inspection Status Change Worksheet, and then choose the related link.
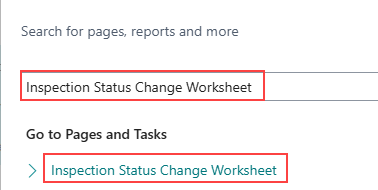
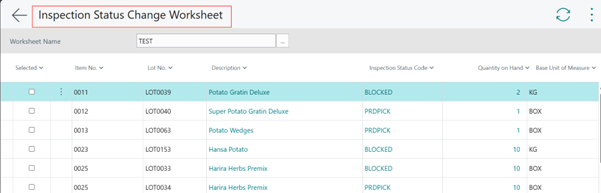
The Inspection Status Change Worksheet screen opens.
-
Tap the Worksheet Name field and select the required worksheet. For example, DEFAULT.

-
In the context menu, select Generate Lines.
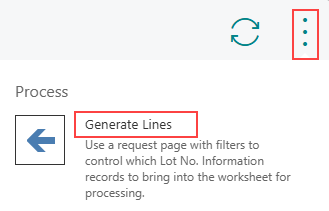
The Generate Worksheet Lines screen opens.
-
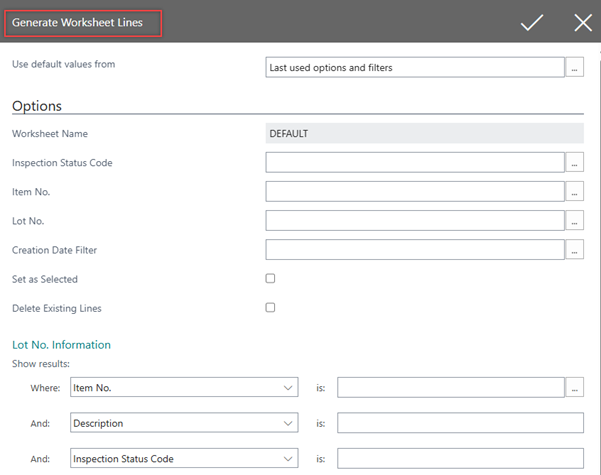
On the Options FastTab, tap the required fields to filter and display the lines.
For example, let us consider a scenario where an inventory manager needs to change the entries with the inspection status code, BLOCKED to EXPIRED. In this case, the Inspection Status Code field, BLOCKED is selected.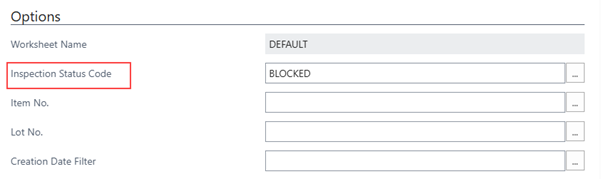
-
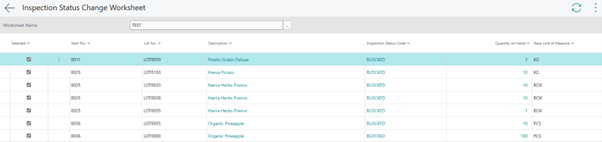
Tap the Set as Selected checkbox to automatically select all lines based on the applied filters.

-
Tap the check mark.

The Inspection Status Change Worksheet page displays lines based on the applied filters. If the Set as Selected checkbox is selected, all filtered lines are automatically selected.
-
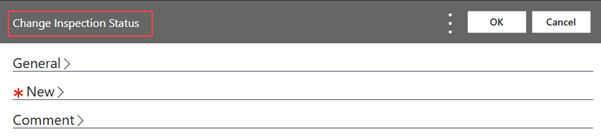
In the context menu, tap the Change Inspection Status action to change the status of the selected lines.

The Change Inspection Status screen opens.
-
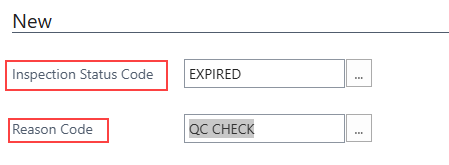
On the New FastTab, tap the Inspection Status Code field to select an inspection status code to which the selected lines are to be changed. In this scenario, EXPIRED.
-
Tap the Reason Code field to select the reason for the change in the inspection status.
-
Tap OK.

The inspection status of the selected entries is changed.