XRM Toolkit
Prerequisites
- User should have permissions and licenses for PowerApps
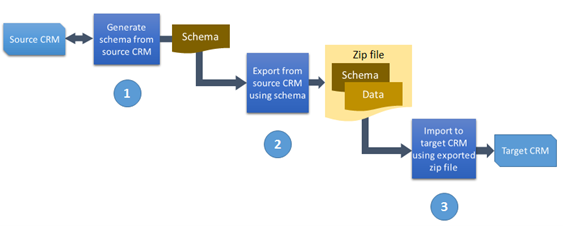
- Knowledge about the solution, schema and data packages should be created and applied in correct manner, not as a whole. For example, first create a schema and data package for master data that could be imported to a new solution and then, demo data making use of this master data.
-
The order data that is imported cannot be influenced. As an alternative, the data package could be imported multiple times until all related data is available for all entities to successfully import.
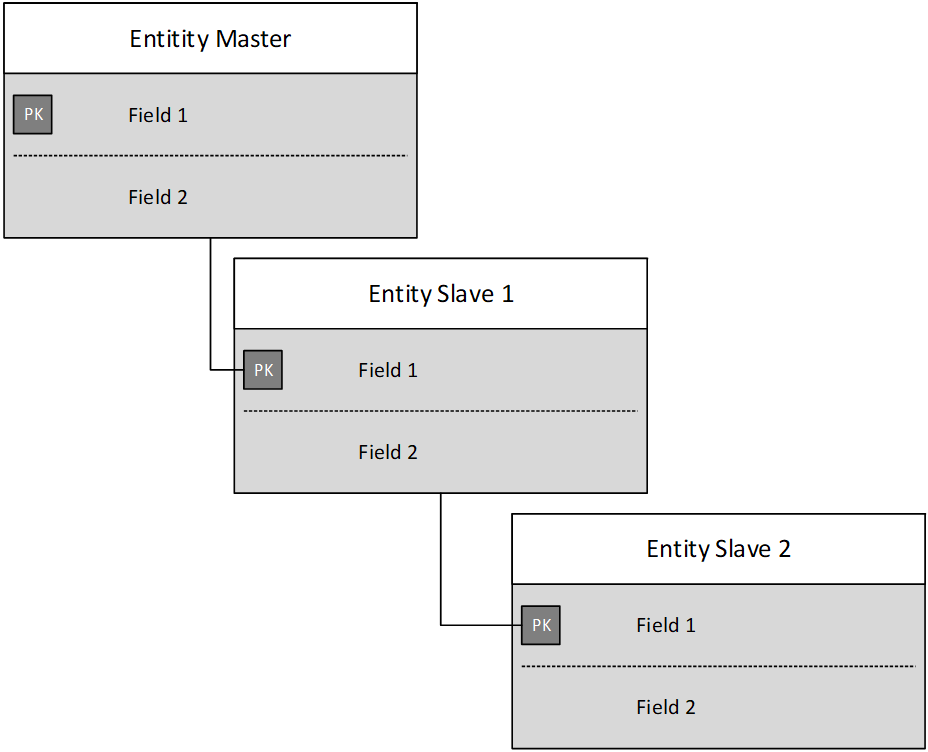
Import order (worst case):
-
Entity Slave 2 > will fail
-
Entity Slave 1 > will fail
-
Entity Master > will succeed (create)
Second import run:
-
Entity Slave 2 > will fail
-
Entity Slave 1 > will succeed (create)
-
Entity Master > will succeed (update / no duplicate data)
Second import run:
-
Entity Slave 2 > will succeed (create)
-
Entity Slave 1 > will succeed (update / no duplicate data)
-
Entity Master > will succeed (update / no duplicate data)
This will only work if compare-on-update is setup correctly. If you do not compare any fields during update, data will be duplicated on a second import run instead of only updating changed values. For details, see the following steps.
-
Install XRM Toolkit
-
Make sure NuGet.Config in
C:\\Users\\<yourusername>\\AppData\\Roaming\\NuGetonly holds reference to:<add key="nuget.org" value="https://api.nuget.org/v3/index.json" protocolVersion="3" />Select View and tick the checkbox against Hidden Items to show the AppData folder.

-
Create folder
C:\devtools -
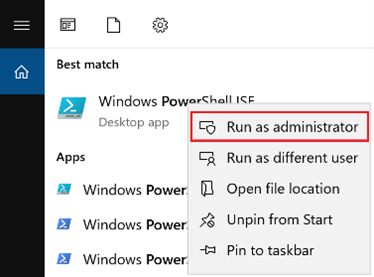
Start PowerShell ISE (Run as administrator).
-
Enter command:
cd c:\\devtoolsin the command console and press enter.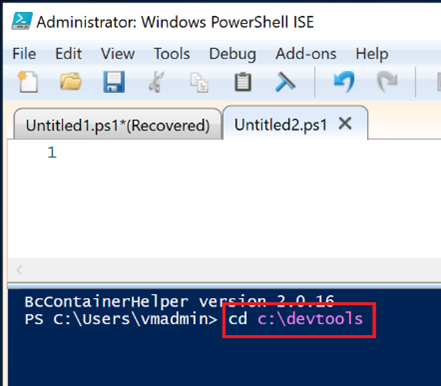
-
Open this link and select the Copy button to copy the latest Windows PowerShell script.
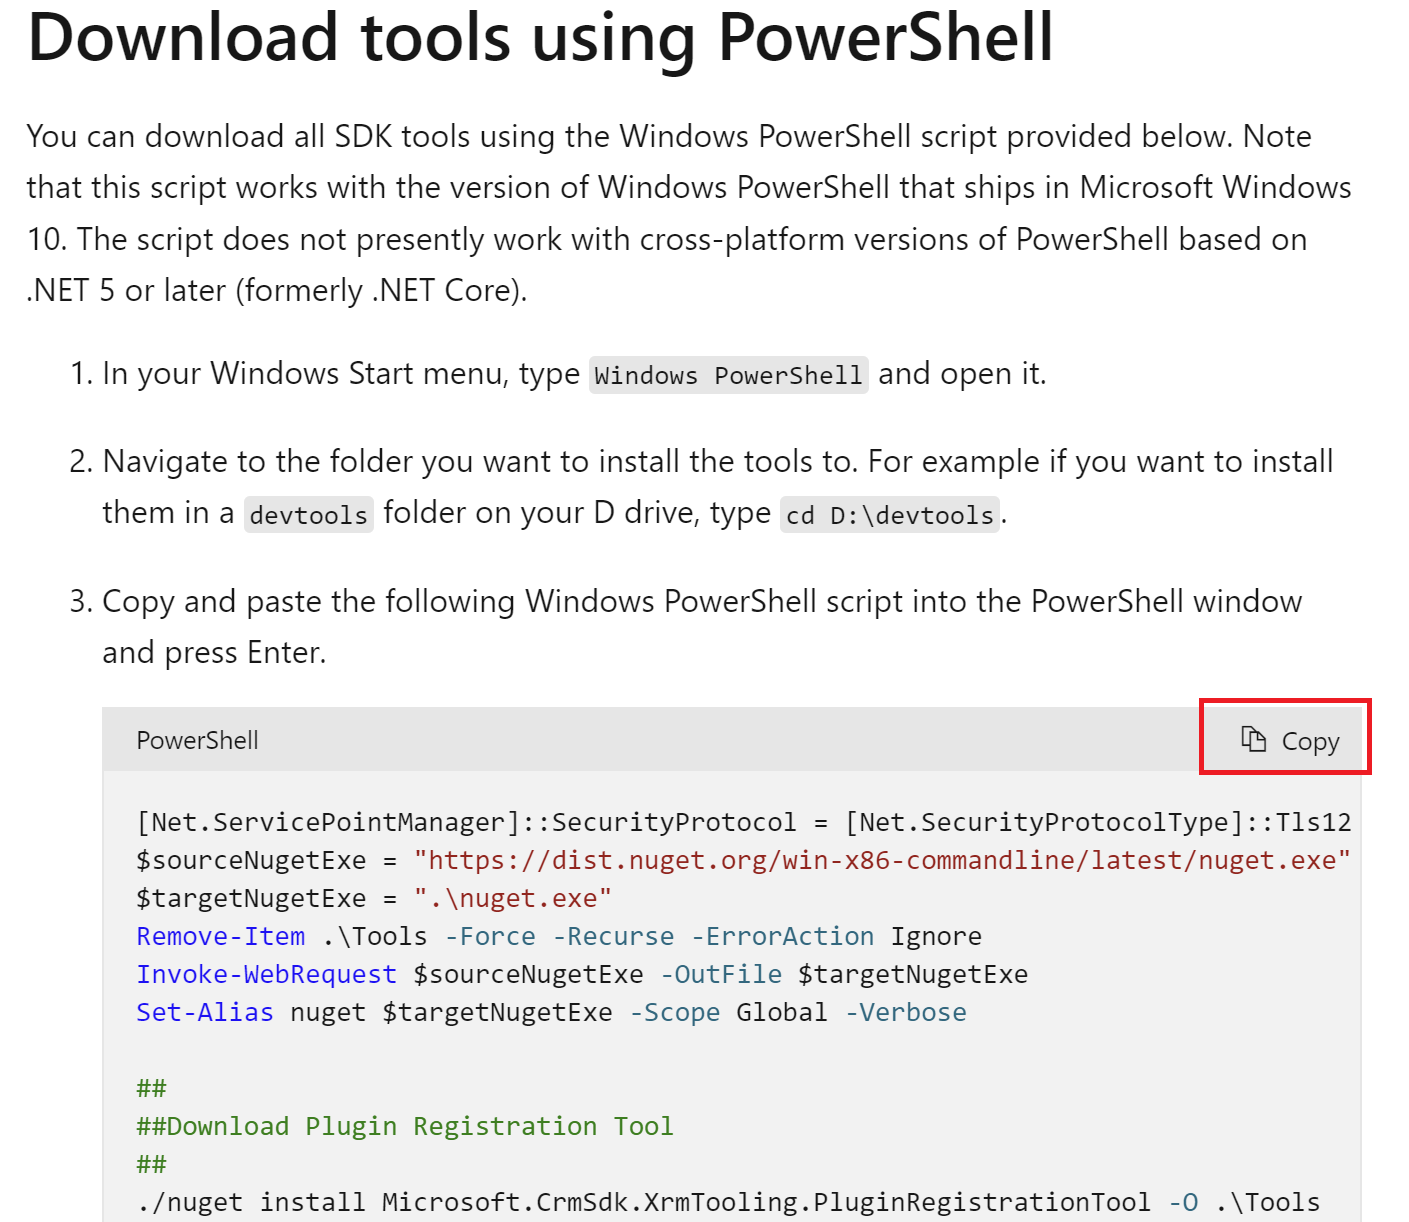
- Paste the script code in the top screen in Power Shell ISE and enter F5 to run the code.
- To start using the Data Migration tool, open the folder
C:\devtools\ConfigurationMigrationand runDataMigrationUtility.exe.