Import the Customer Item Catalog Solution
To import the new Customer Item Catalog Power Automate Solution v1.0.0.0, follow the below steps:
Before using the new version of Customer Item Catalog Power Automate Solution v1.0.0.0, it is necessary to delete the old flow Import Item Catalog Excel Attachment from email to BusinessCentral Flow v1.3.0.0, as described in the Upgrade to the Latest Version section.
- Sign in to Power Automate and on the navigation bar, select Solutions.
-
On the action bar, select Import solution.
The Import a solution page opens.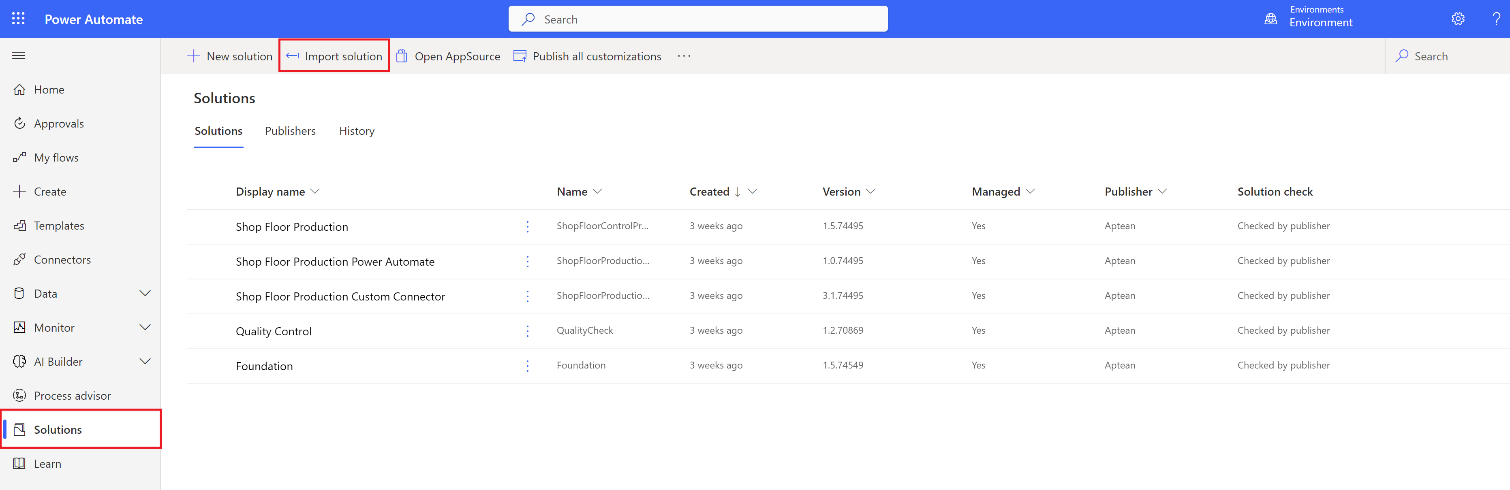
- Select Browse.
- Upload the file you want to import.
- Select Next.
- On the Advanced Settings FastTab, select the Enable Plugin steps and flows included in the solution checkbox.
- Select Next.
-
On the Connections FastTab, Select Business Central Online and Office 365 Outlook Connection.
If connections do not exist, select New connection to create a record. You should also refresh the Import a solution page to view the created connection.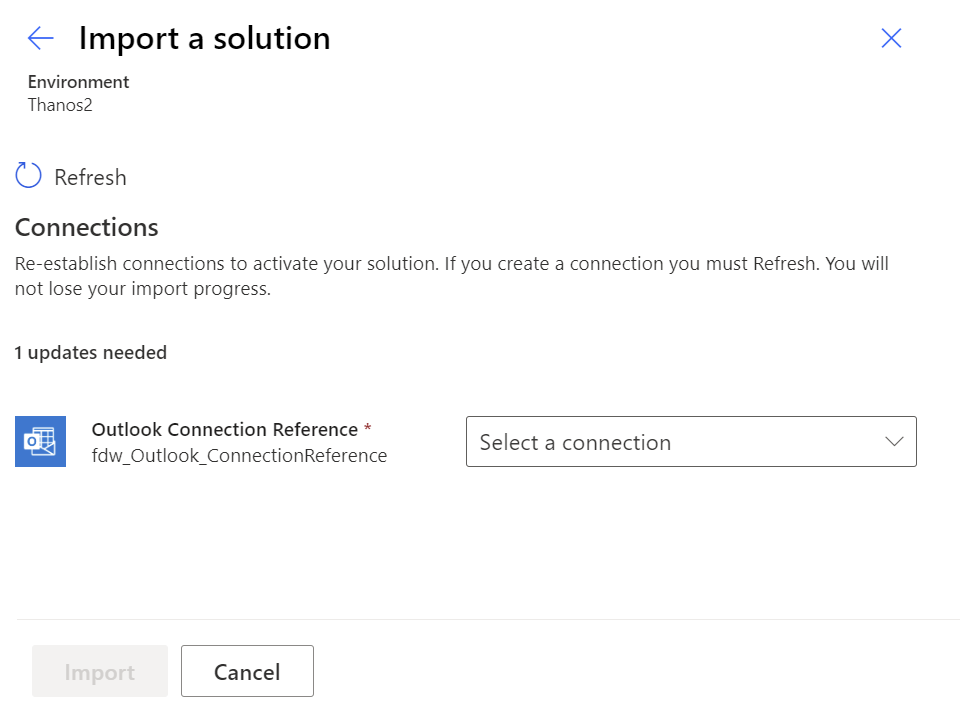
The specified connection can be changed later by modifying the connection reference through the Default solution in the environment, which holds the environment-specific values used during runtime. After changing the values, turn the Power Automate Off and On again to use the new values.
- Select Next.
- Configure the values in the required fields.
> [!NOTE]
> If you import a new version of the solution, there is no need to reconfigure the values as they will remain unchanged.
>
>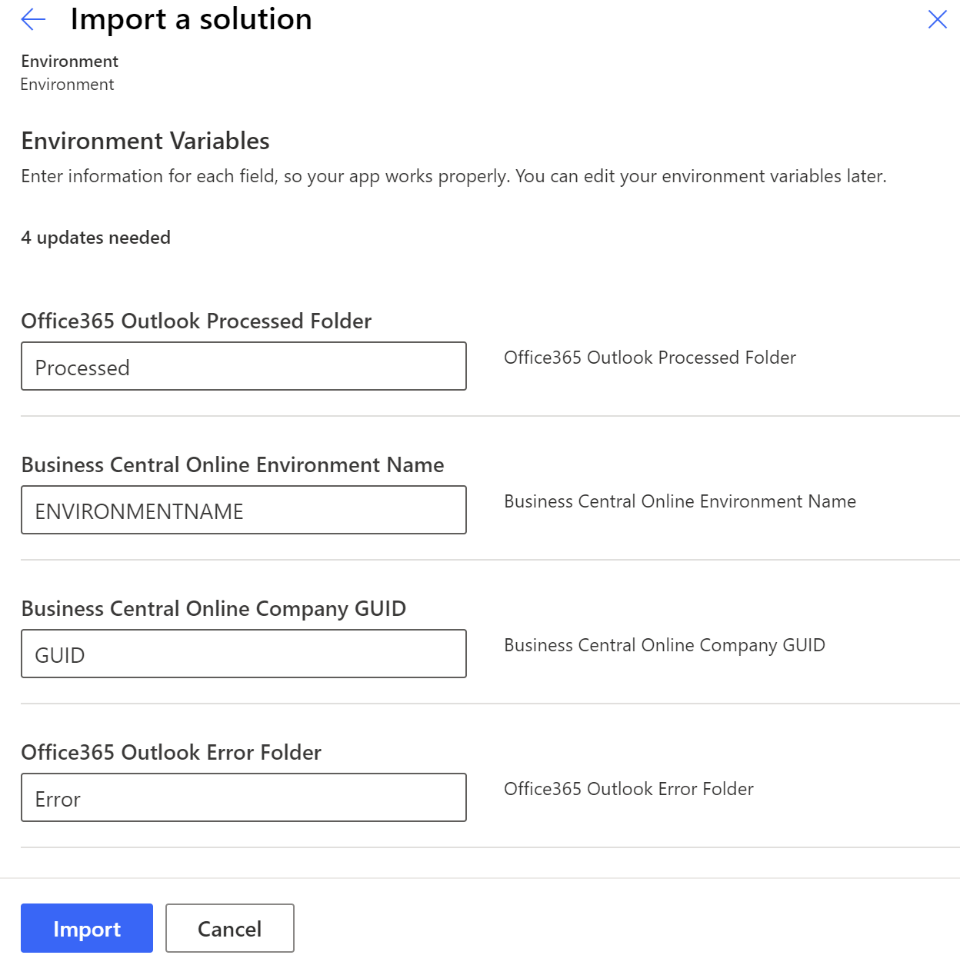
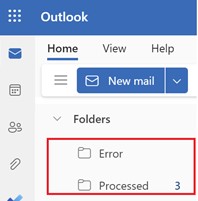
- Enter the folder name for Office365 Outlook Processed Folder.
- Enter the folder name for Office365 Outlook Error Folder.
> [!NOTE]
> The entered folders must be available in the mailbox.
>
>
-
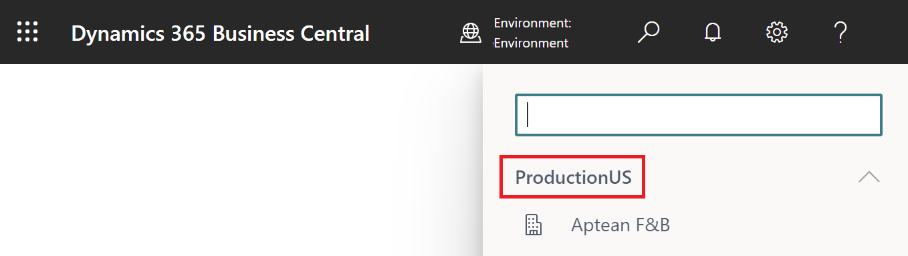
Enter the environment name for Business Central Online Environment Name. The characters should be in uppercase.
-
In the Business Central Online Company GUID field, enter the Company GUID.
To copy the GUID
- Login to your Business Central Online company.
- Navigate to the Companies page.
- Select the desired company.
- Press CTRL+ALT+F1 to open the Page Inspection.
- Copy the GUID value from the Id (8000,GUID) field.
-
Click Import.
This will import the Solution with the configured values and turn On the Power Automate.To view the details, click the created cloud flow by navigating into the solution.