Basic Setup

Article05/29/20233 min read

Load Extension

  1. Select the Search icon , enter Extension Management, and then choose the related link.


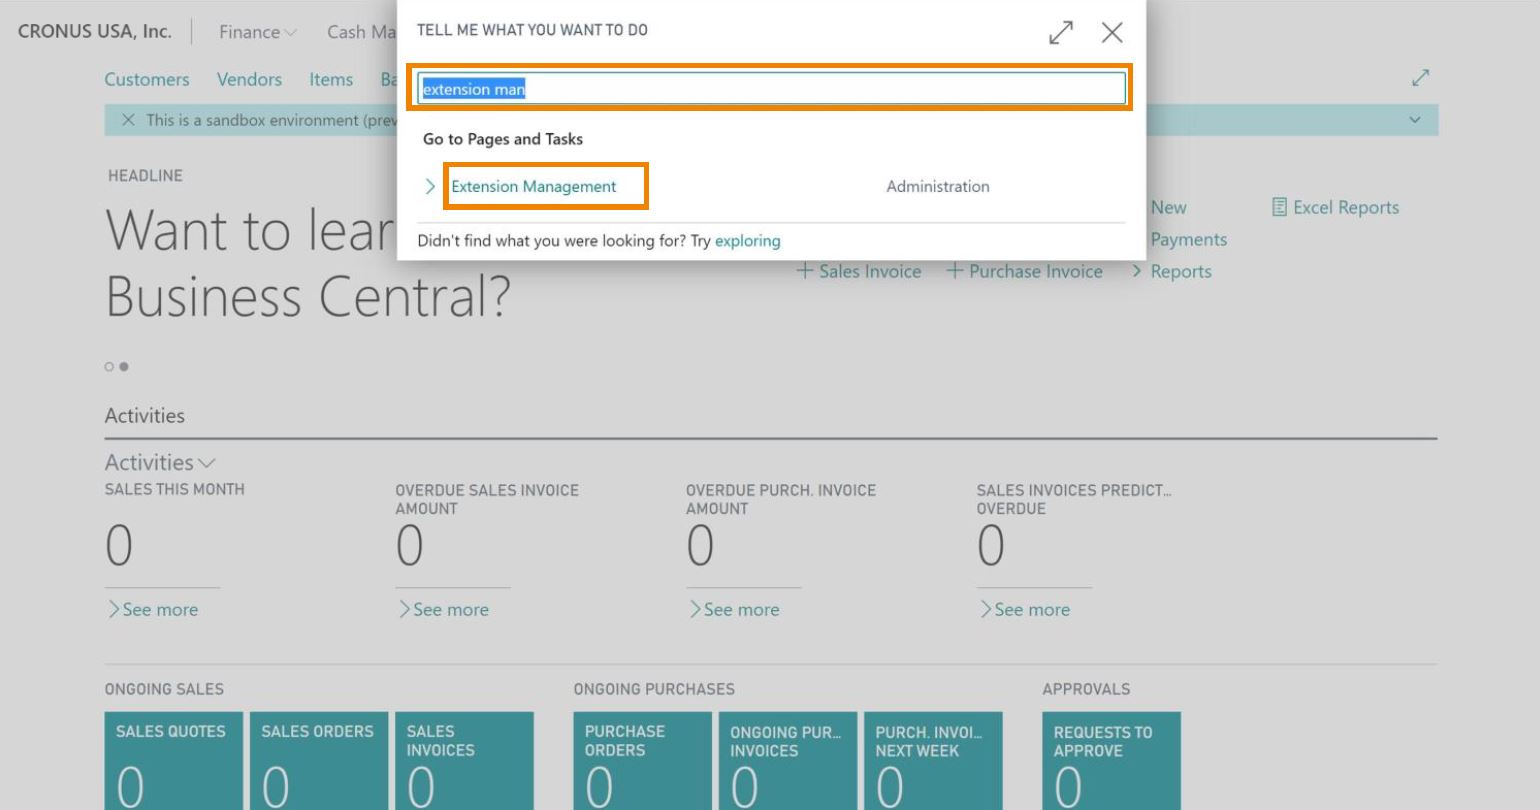
    The Extension Management list page opens.

  2. Select and click Aptean Advanced Workflow.

  3. On the context menu, click Install.
    The Extension Installation page opens.

  4. Click Next.

  5. Click Install on REVIEW EXTENSION INFORMATION BEFORE INSTALLATION.
    The extension is installed, and a prompt appears to confirm the same.

  6. Click OK.

  7. Similarly, install the Aptean Advanced Workflow Base Application extension.
    On installing the two extensions, the description in the EXTENSION MANAGEMENT page changes to Installed.

Change Role Center

  1. On the Business Central Role Center, click Settings .
  2. Select My Settings from the dropdown menu.
  3. On the My Settings page, change Role to Administrator (Aptean Advanced Workflow) from the AssistEdit button.
  4. Click OK.

Set up Workflow

  1. On the Role Center in Business Central, click Setup.

  2. Select and click Workflow Setup.


    The Workflow Setup page opens. A confirmation prompt appears to check if the system should try to identify the setup for web services on the base of your session ID.

  3. Click Yes.


    A prompt appears to check if the system should try to identify the setup for universal app on the base of your session ID.

  4. Click Yes.


    A prompt appears to confirm whether you want to use the profile WKFL - ADMINISTRATOR as default.

  5. Click Yes.


    A prompt appears notifying you that the profile WKFL -ADMINISTRATOR already exists and to confirm whether you want to overwrite the profile.

  6. Click Yes.


    A prompt appears to confirm whether you want to create the WKFL Cue Setup and notify you that the existing setup will be overwritten.

  7. Click Yes.


    A prompt appears to confirm whether you want to create the currently logged user as an employee and add it to the administration team ‘WKFLADMIN’.

  8. Click Yes.


    A prompt appears to confirm whether you want to create the Job Queue Entries for Aptean Advanced Workflow.

  9. Click Yes.

Load Teams and Employees

To Load Teams

  1. On the Role Center of Business Central, click Setup.

  2. Select and click Workflow Setup.


    The Workflow Setup page opens.

  3. On the action bar, click the AssistEdit button, select Actions > Initialize > Team > Load from table 5083/“Team”.
    A prompt appears to confirm whether you want to load the teams from the table 5083/ ‘Team’.

  4. Click Yes.
    A prompt appears to confirm whether you want to load the assignment of employees from the table 5084 / ‘Team Salesperson’.

  5. Click Yes.
    A prompt appears to notify the creation of teams.

  6. Click OK.

To Load Employees

  1. Select the Search icon , enter Employees, and then choose the related link.
    The Employees Administration page opens.

  2. On the action bar, click New.


    The Employee Card page opens.

  3. On the General FastTab, enter values in the Code and Name fields.

  4. On the References FastTab, enter the ID in the User ID field.

  5. Click the Back button to navigate to the Employees page.

  6. To delete a user, select the required line and click Delete on the action bar.

To update Teams

  1. Select the Search icon , enter Teams, and then choose the related link.


    The Teams Administration page opens.

  2. Select and click Workflow Admin in the Code field.

  3. On the action bar, click Employee.
    The Team Employees page opens.

  4. Select and click the required Employee Code to choose the employees.

  5. Click the Back button to navigate to the Role Center.

To define keywords as information about the data item

  1. On the Role Center, go to Setup > Reference Types.


    The Reference Types page opens.

  2. On the action bar, click New to open the Reference Type Card.

  3. On the General FastTab, enter values in the No., Editing Page ID and Buffer Time on Function fields.

  4. Turn on the Automatic Workflows toggle.

  5. On the action bar, click Keyword Definitions.
    The Workflow Keyword Definitions - Customer page opens.

  6. Enter the Table ID and Field ID to define Keywords as Information about the Data Item.

  7. Click the Back button to navigate to the Role Center.