Assign lot attributes to a lot number
There is a possibility to assign lot numbers to any Item in an incoming or outgoing document for item tracking.
Lot Attributes can be linked to Lot Numbers that provide extra information about the specific lot. The Lot Attributes can be used for reporting purposes.
The item reclassification journal can be used for several reasons, such as performing "system transfers" by reclassifying bin and location codes. When using this journal, it is possible to specify a new lot number in the Item Tracking Lines. This new lot number will take the place of the lot number selected in the Lot No. field. When a new lot number is created or assigned, the Lot Attributes will be copied from the original lot number to the new lot number. When selecting an existing lot number instead of creating a new lot number, the Lot Attributes will not be copied from the original lot to the selected existing lot.
Assign lot numbers
The visibility of previously registered Lot Attributes is shown in different incoming documents. The item tracking can be opened via the following incoming documents:
- Purchase order
- Warehouse receipt
- Production order
- Sales return order
- Incoming transfer order
- Assembly order
In this instruction, it shows the visibility via a Purchase Order.
- Navigate to the Item Tracking Lines page from the Purchase Order page.
Before it is possible to assign lot attributes to a lot, the lot number has to be assigned to the item. - On the action bar, select Home > Assign Lot No.
A Lot No. Information Card is generated automatically.
Reuse of lot numbers in the incoming purchase documents
Reuse of already created lot numbers in incoming purchase and sales documents is possible.
Based on the Global Lot Attribute values on the document line, the system filters the lot numbers and shows only those lot numbers which have matching values.
An error occurs, while entering the non-match values to an existing lot number.
This applies for all incoming documents with lot numbers.
Assign lot attributes
When a lot number is assigned to Item, the Lot Attributes can be assigned to the lot number.
- For the selected purchase order on the Item Tracking Lines page, select Home > Assign Lot Attributes.
The Lot Attribute Values page opens. - Select Attribute field and select the lot attribute from the list, e.g., "pH" created on the Lot Attribute page.
-
In the Value field, enter the value based on the selected lot attribute, e.g., "7".
If the minimum and maximum value requirements are defined for a lot attribute, you must enter a value that adheres to the defined requirements. For more information, see Set up lot attributes.
- Select OK to apply the changes.
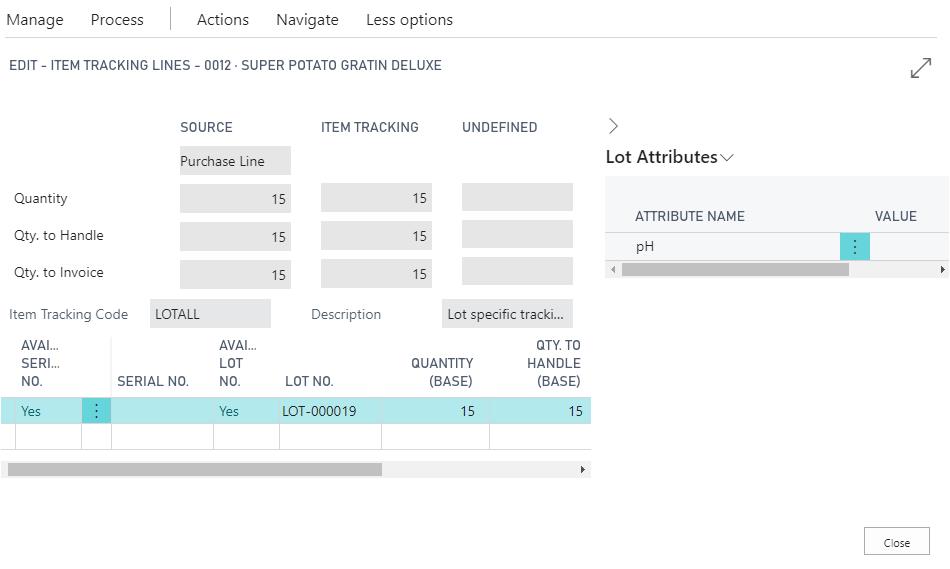
The assigned lot attributes are shown in the FactBox pane with the added Lot Attributes and values per Lot No. on the Item Tracking Lines page.
There are different ways to show the Lot Attributes and add, edit, or delete these. The following topics describes the different ways.
Add or edit lot information on the lot information card
There are different ways to show the Lot Attributes and add, edit, or delete these. The following two topics describe the same. Via the Lot information Card, there is a possibility to go to the Lot Attributes. When there is information for the specific lot, it is possible to register these via the Lot Information Card as a Lot Attribute.
- Select the Search icon
 , enter Purchase Order,and then choose the related link.
The Purchase Orders list page opens. - Select the No. field for the required purchase order.
The Purchase Order card page opens. - On the Lines FastTab, on the action bar, select More options.
The Line menu appears. - Select Line > Item Tracking Lines.
The Item Tracking Lines page opens. - On the action bar, select Line > Lot No. Information Card.
The Lot No. Information Card page opens. - On the action bar, select Related > Lot No. >Attributes.
The Lot Attribute Values page opens. It is possible to add, change, and delete lot attributes and values on this page.
Add or edit lot information on the inventory put-away
There are different ways to show the Lot Attributes and add, edit, or delete these. The following topic describes the same.
During the receiving process it is possible to add or edit Lot Attributes. Via the Inventory Put-Away it is possible to go to the Lot Attributes.
- Select the Search icon , enter Inventory put-aways,and then choose the related link.
The Inventory Put-aways list page opens. - Select the No. field for the required record.
The Inventory Put-away card page opens. - On the Lines FastTab, on the action bar, select More options.
- Select Line > Lot Attributes.
The Lot Attribute Values page opens.
Either delete/edit an already assigned attribute or add a new one. - To edit a value for an existing lot attribute, e.g., "pH", enter a new value in the Value field, e.g., "6.8".
- To add a new lot attribute, select Attributeand select another lot attribute from the list, e.g., "Grade" created on the Lot Attribute page.
- In the Value field, select the value based on the selected lot attribute, e.g., "A".
-
Select OK to apply the changes.
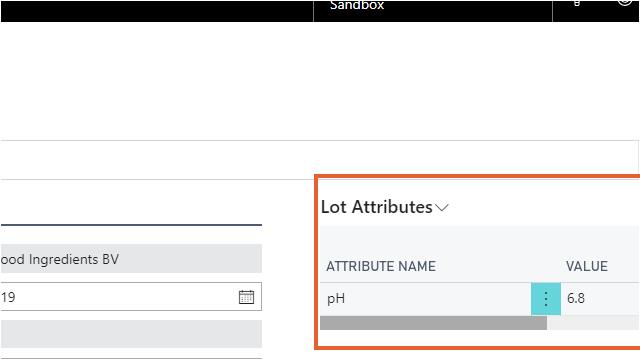
The assigned lot attributes are shown in the FactBox pane on the Inventory Put-away page.