Aptean Mobile Warehouse Registration Activity
If the user opens the Put-Away activity by clicking the icon on the Aptean Mobile Warehouse Registration home screen, the application will initially present a list of warehouse put-aways to which that user’s ID has been assigned.

The user can select the desired document. The Put-Away page is opened with the relevant document assigned.
This list of user-assigned warehouse put-aways is only displayed when the activity is launched through clicking the icon on the home screen. If the Put-Away activity is launched through the Action menu or via a quick scan, the application will immediately begin with the Put-Away page. If the entered put-away was not previously assigned to the user, its assigned user ID will be automatically updated by the program. At any point, a put-away can be re-assigned by choosing the Assign to User option. The program presents a list of available Dynamics users. When a new user is selected from this list, the put-away will re-assigned accordingly.
When the Put-Away activity is launched by performing a quick scan on a posted warehouse receipt or an inbound document that has already been assigned to an existing put-away record, the application will display that put-away. In locations that utilize warehouse put-aways, it is not possible to view a put-away by scanning an active warehouse receipt, since warehouse put-aways are not created until after the posting of a warehouse receipt and its related inbound transactions.
The user may change the currently-entered transaction to a different put-away by manually entering or scanning the put-away number in the Put/PO/Trans/WMS No. field, then physically pressing either the Enter or F5 button on the handheld device.
Additional information about the items that have been assigned to the currently-entered put-away can be obtained on the Lines tab.
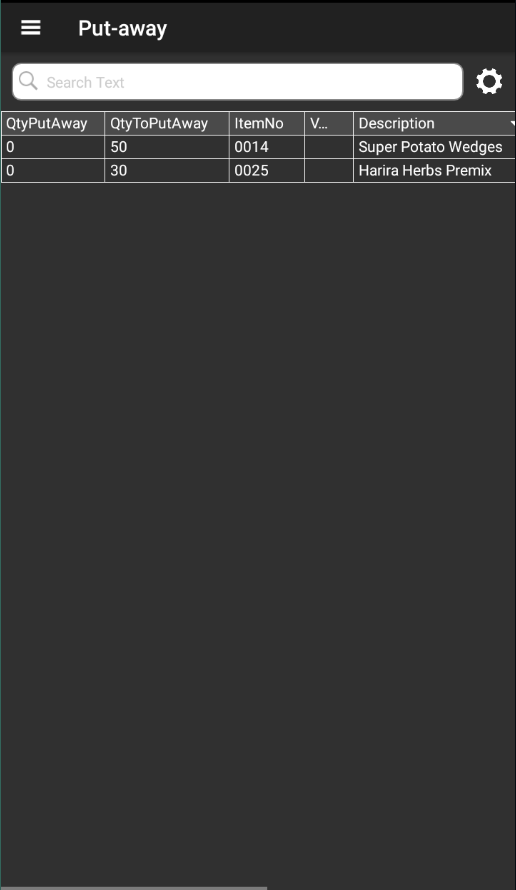
This screen presents the items that appear on the put-away. Information such as the quantity to be put away and any recorded put-away quantities is included, as well.
Information about the individual activities that have been recorded for the put-away can be obtained on the Scanned tab.
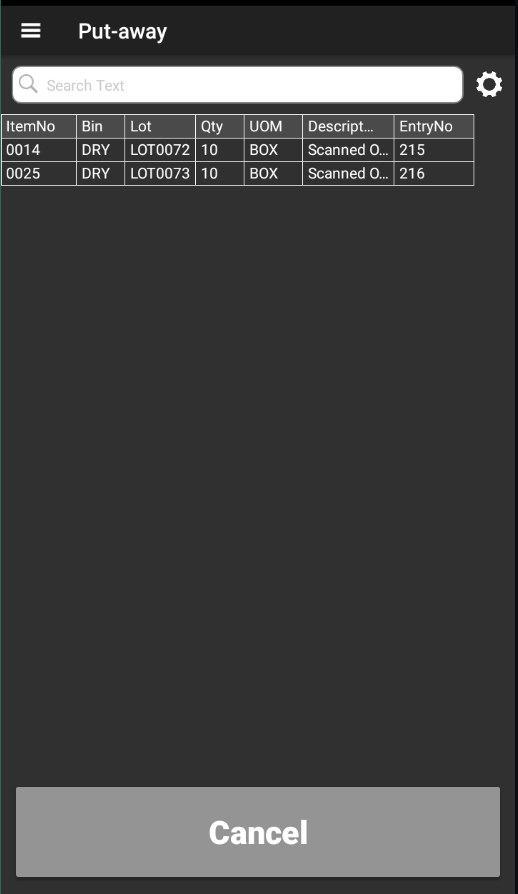
This screen presents each put-away activity that was recorded. In addition to basic information such as item number, lot number, and quantity, the date and time at which each entry was recorded is included.
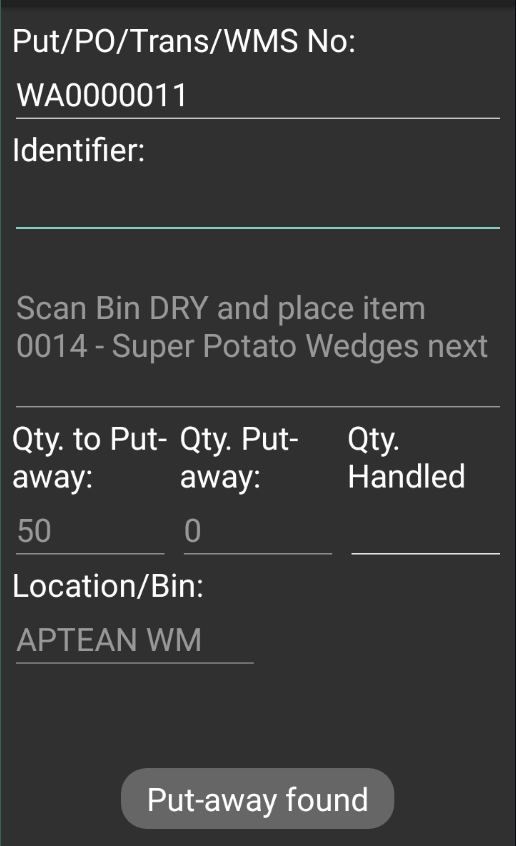
The application will attempt to direct the user’s put-away activities by instructing him or her as to what information should be recorded in the Identifier field.
For example, in the above screenshot the user is instructed to scan bin DRY and select item 0014 for placement. The application obtains these values by selecting the first line with an outstanding quantity to handle on the relevant put-away document.
To record put-away activity, complete the following steps:
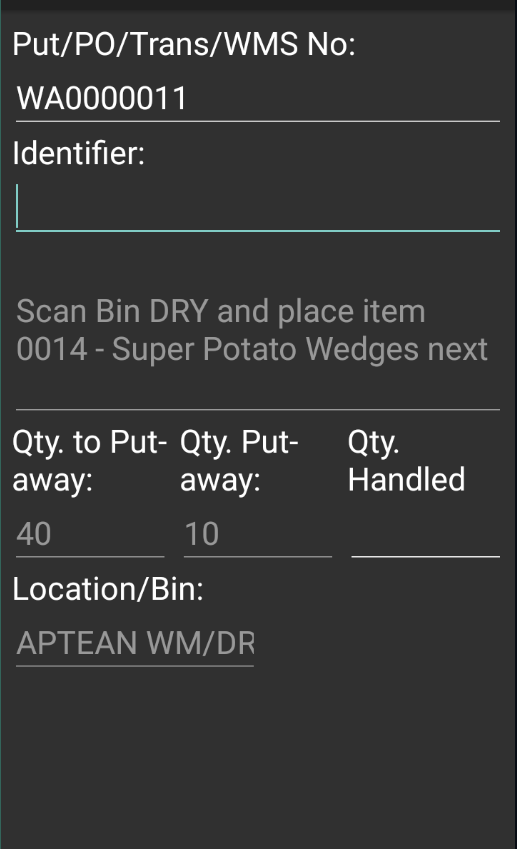
- In the Identifier field, enter or scan the bin code into which the put-away will occur. The bin code must appear within the put-away’s assigned location. If you enter a bin code that appears on one of the put-away’s lines, the application will present the item number that is assigned to that line. If the newly-entered bin code is assigned to multiple lines, the application will select the first applicable line. You can also enter a bin code that does not currently appear on any of the put-away’s existing lines. In this scenario, the application will assume you wish to put away the specified item into this new bin, and proceed accordingly.
- In the Identifier field, enter or scan the item number that will be put away. The item number must exist within the entered bin.
You can view information about the currently-entered item by clicking the Item Info. (F6) button on the screen or physically pressing the F6 button on the handheld device. The Item Information page will open for the relevant item.
If you also use the Aptean Food and Beverage License Plating extension, when handling an item that is license plate tracked, the license plate number should be scanned or entered in the Identifier field instead of the item number. On the Scanned tab, the lot number and quantity of the item are automatically filled. In case of scanning or entering a license plate number that appears on multiple warehouse put-away lines and will store multiple lots and/or items, the item number, lot number and quantitiesare also entered automatically for all the warehouse put-away lines that contain the license plate number.
- If an item is lot tracked, you must also specify the lot number of the item that will be put away.
When the item number (and lot number, if applicable) is entered, information about the item is displayed in the area beneath the Identifier field.
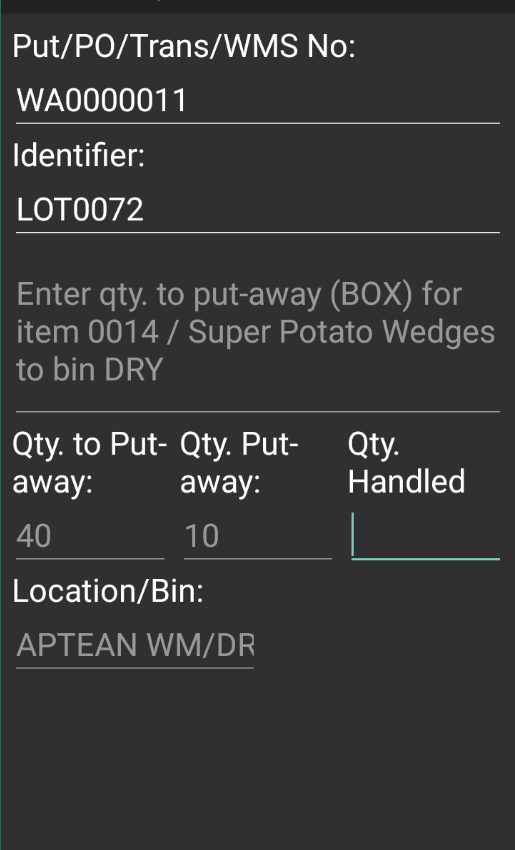
In addition, information about the item’s remaining quantity to put away and quantity already put away is displayed on the page.
- Enter the quantity of the item to put away in the Qty. Handled field. The entered quantity cannot be greater than the remaining quantity to put away. The remaining quantity to put away and quantity already put away values will be updated accordingly.
It is possible to enter activity against the same item more than once. Depending on how the activity has been set up, each additional quantity you specify will be either absolute or cumulative. If the activity has been configured to treat entered quantities as absolute, the put-away quantity will always be updated with the latest quantity to handle. For example, if we entered a quantity to handle of 2 units, the put-away quantity would be set to 2 units. If we then entered a quantity to handle of 3 units, the put-away quantity would also update to 3 units. If entered quantities are cumulative, each subsequent quantity to handle will be added to the total. Using our previous scenario, entering a quantity to handle of 2 units would result in a put-away quantity of 2 units, but entering a quantity to handle of 3 units would update the put-away quantity to 5 units.
If it is necessary to cancel an entered put-away quantity,the user can open the Scanned tab, select a line, and click the Cancel button. The application will ask if you want to cancel the scan entry.
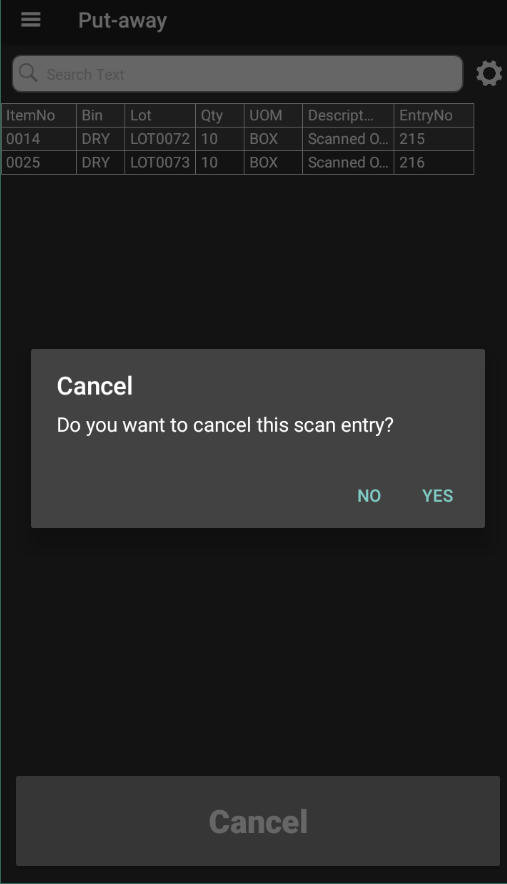
Answering Yes will delete the line and undo the put-away activity it represents.
Repeat the previous steps to put-away additional items. The Aptean Mobile Warehouse Registration activity will maintain the currently-entered put-away, so that it is possible to specify additional items from the same document.
Depending on how the activity has been set up, the user may have the ability to register the warehouse put-aways through the Aptean Mobile Warehouse Registration application. If this feature has been enabled, a user may register the document by clicking the Register (F9) option at the bottom of the screen or physically pressing the F9 button on the handheld device. The recorded scan data will be transferred to the Qty. to Handle field on the warehouse document within Business Central, and then registered.
If you also use the Aptean Food and Beverage License Plating extension, if you register the put-away, the recorded scan data will be transferred to the Qty. to Handle field on the warehouse document within Business Central, and then registered.