Set up integration with Loftware Cloud Trigger
The following procedure explains how to integrate Loftware Cloud Trigger (printing software) or Loftware Cloud Print with the Aptean Labeling extension:
- Setup the Loftware Cloud Trigger.
For more information, see Cloud Trigger – Loftware Help Center. - On the Labeling Setup page, in the Integration Type field, select Loftware Cloud Trigger.
The Integration Type value field cannot be left blank. If it is blank, the system displays a notification on the Role Center indicating that it is not configured.
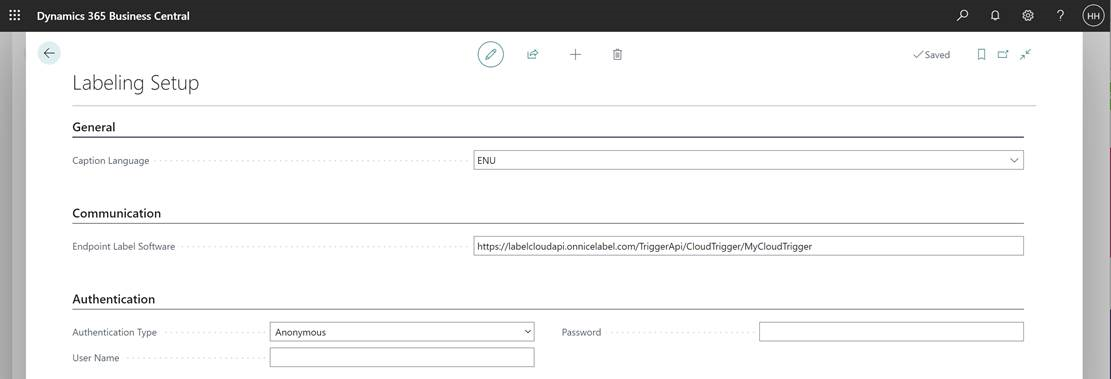
- In the Endpoint Label Software field, enter the URL of the endpoint selected in the Integration Type field to send labels. (Use the created CloudTrigger, MyCloudTrigger shown in the below figure is an example).
- In the Communication Type field, select the following communication type for label batching that allows optimization of API calls when printing multiple labels.
- Single: Send labels individually in separate API calls.
- Combined: Group multiple labels into a single API call.
Ensure the relevant configurations are completed in the NiceLabel Cloud software for this functionality to take effect. To know more about the configurations on the NiceLabel Cloud software, see:
Batch Printing Session Printing Configuring JSON filter.
-
On the Authentication FastTab, in the Authentication Type field, select Anonymous.
-
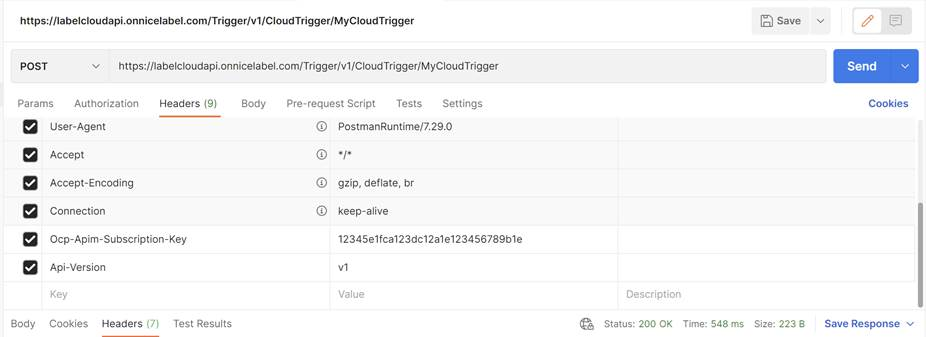
Enter the following header names and header values via Custom Http Headers. This is automatically added as additional http header values in the request to the NiceLabel Cloud as shown below:
i. Api-Version, value as setup when creating the Cloud Trigger in Nicelabel Cloud, default is v1.
ii. Ocp-Apim-Subscription-Key, key as generated when creating the Cloud Trigger in Nicelabel Cloud, example value: 12345e1fca123dc12a1e123456789b1e.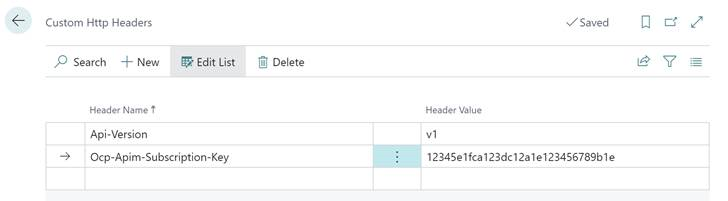
Based on the above setup, the headers are accepted in the NiceLabel Cloud environment: